- Create your model with a scale of 1.00
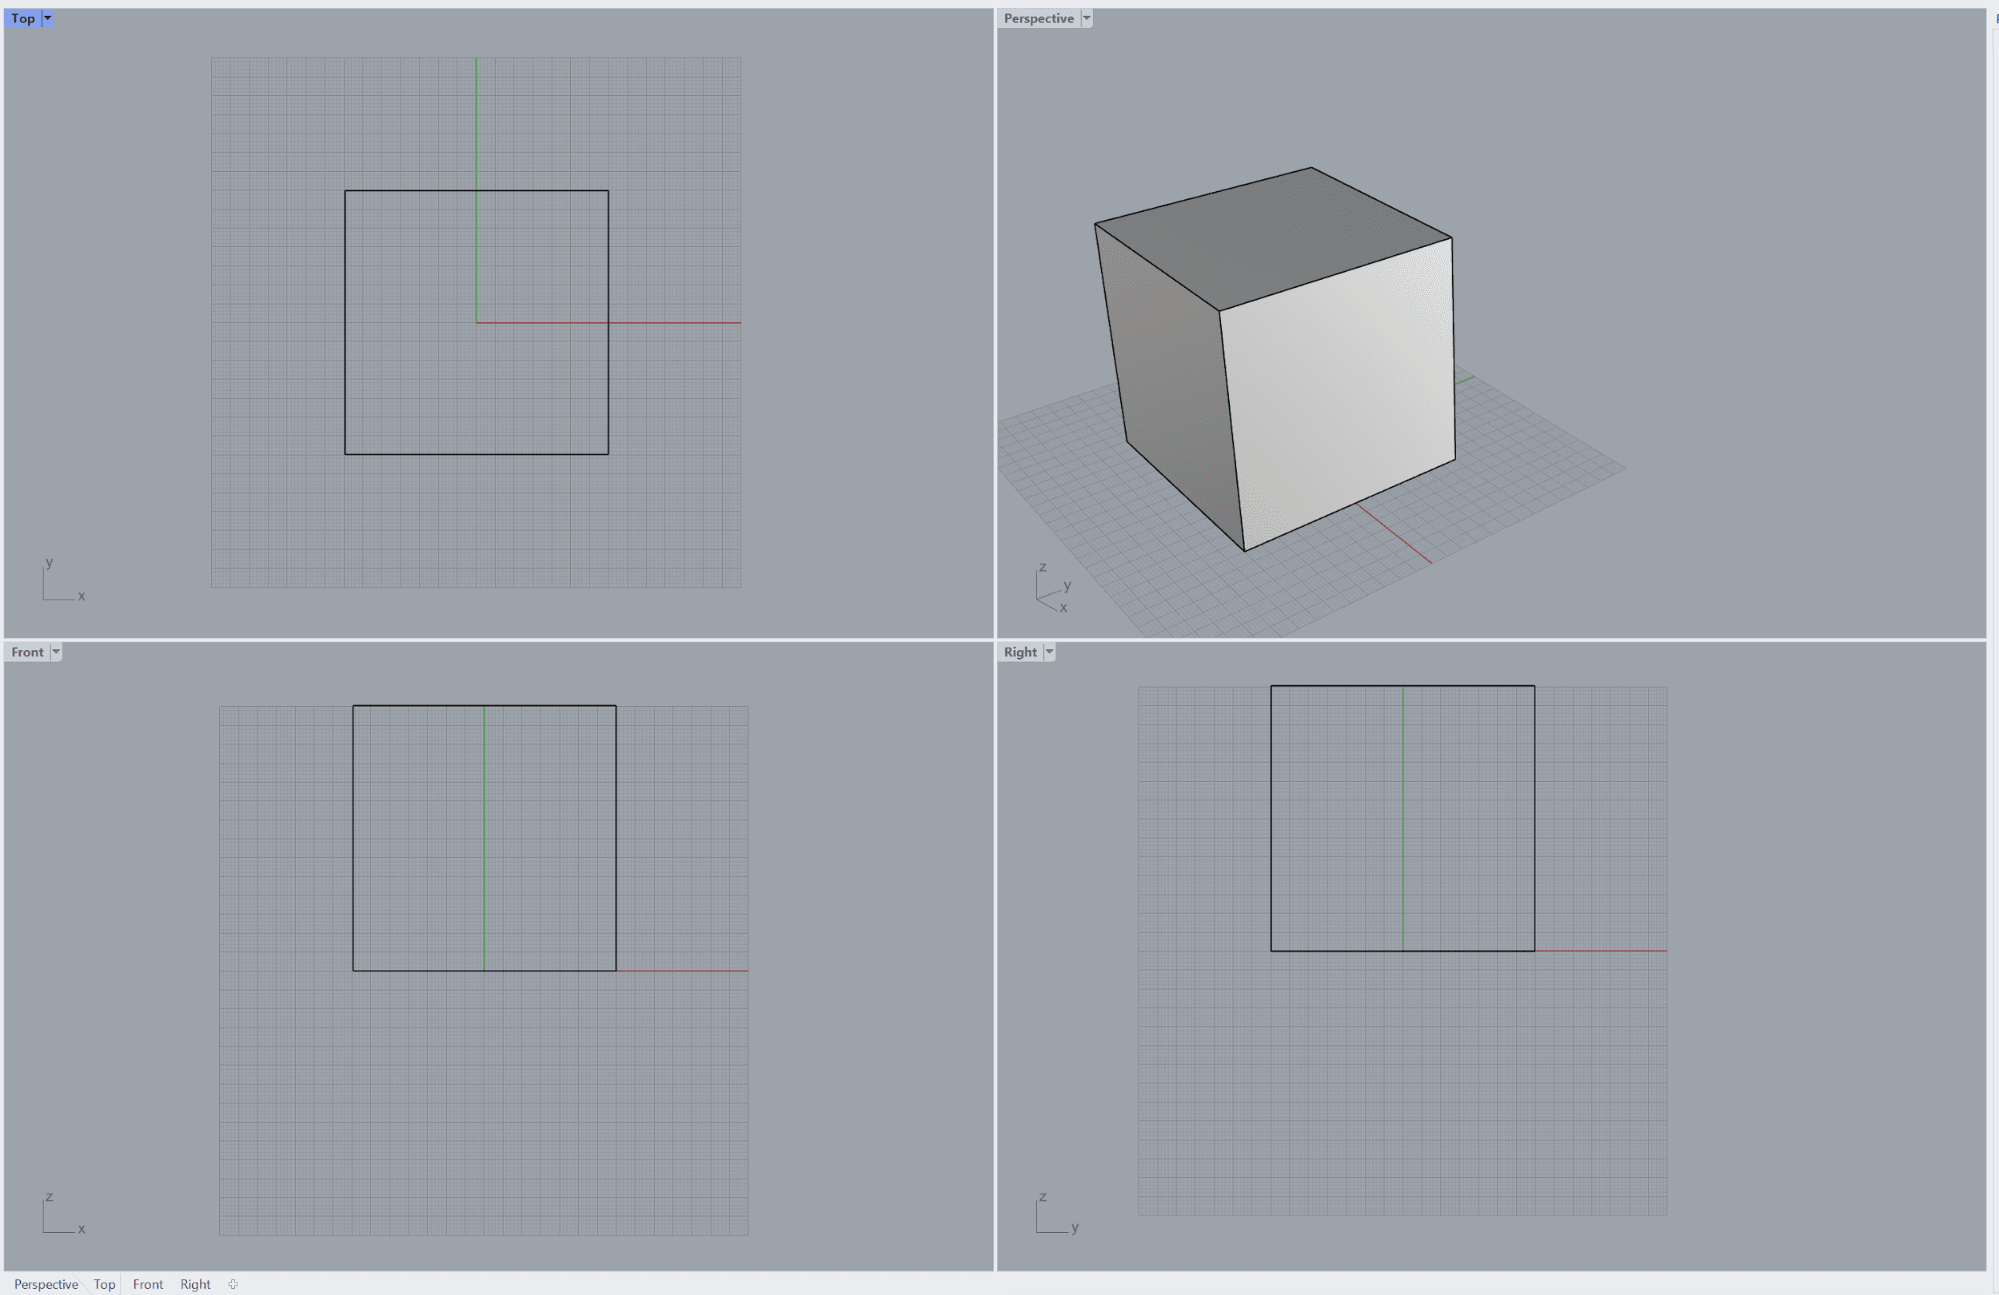
-Make sure your model is centered around (0,0,0) and its bottom is above 0 on the Z axis, like this:
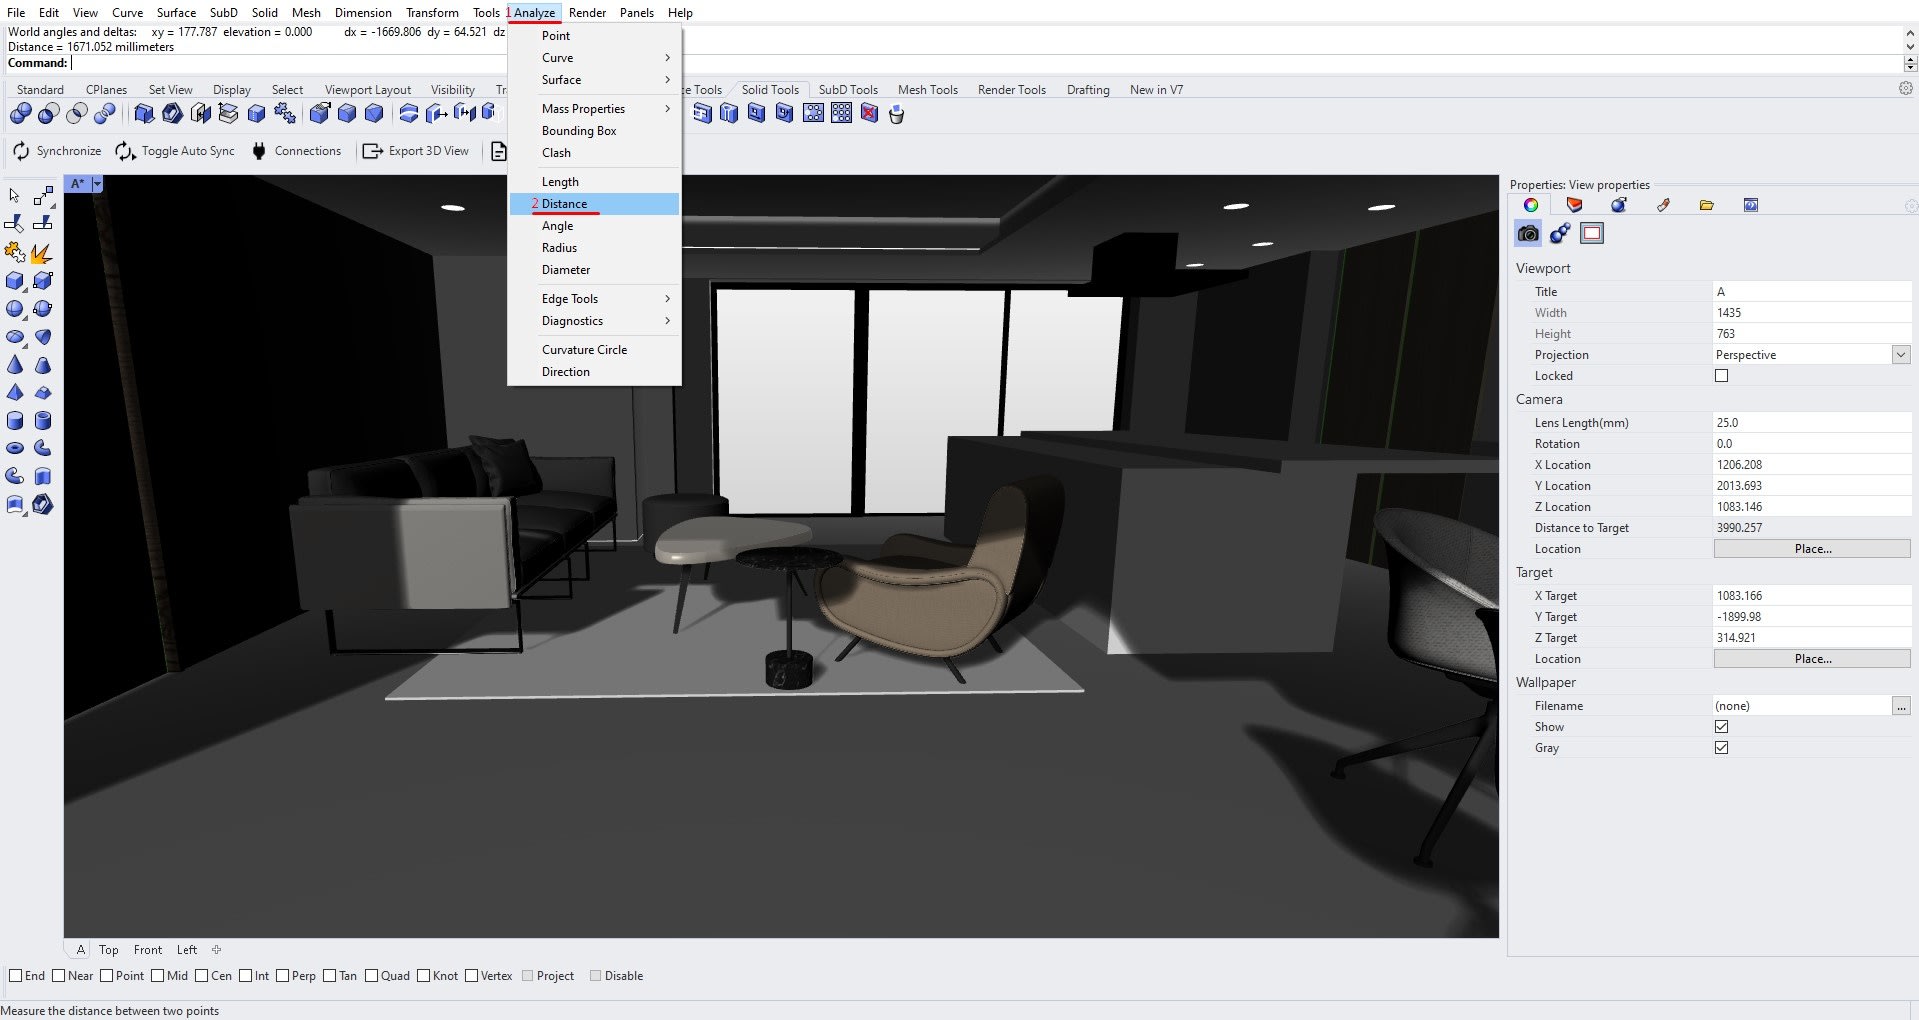
Open your 3d scene and make sure that it has correct real world dimensions using distance tool. Measure any object in your 3d scene with two points and make sure that the size is correct.
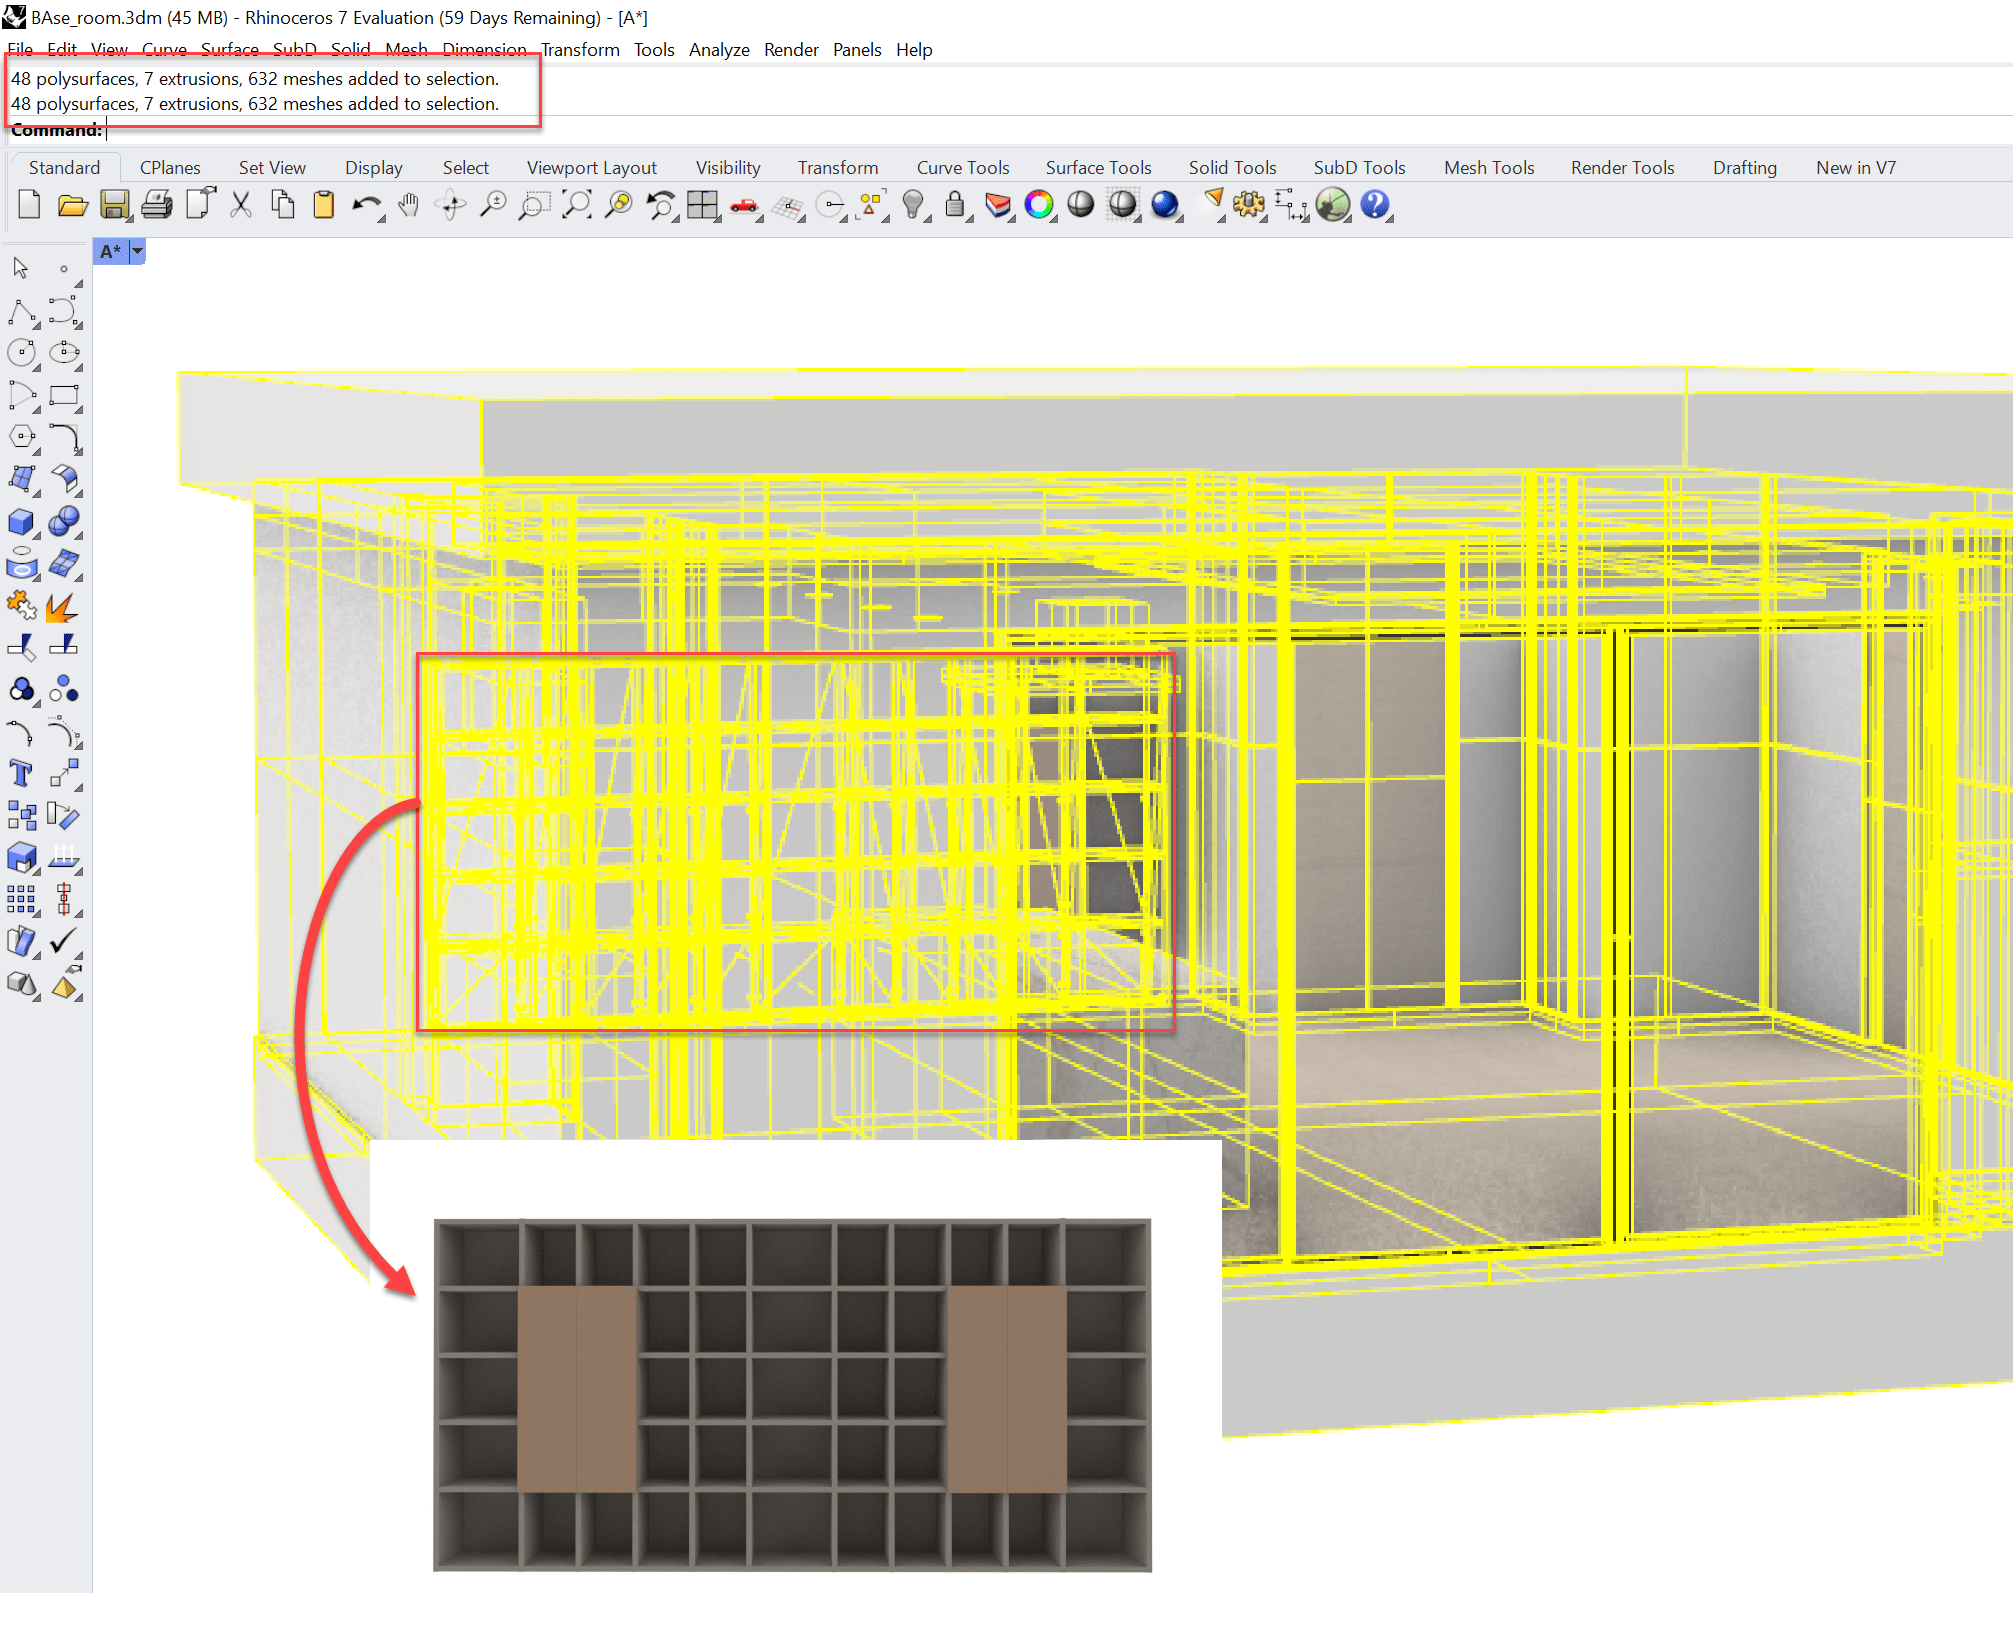
I think the reason it is so slowly loaded at you is because the scene is poorly optimized. I checked this datasmith data and it has 17 000 .udsmesh files in its folder, which is insane amount. I am not sure but I suspect that each of these files are for some really small part of the scene. Therefore, I think unreal is creating a seperate static mesh actor for each part of the scene. I just checked it in the debug view of scene rendering and it says 12 000 mesh drawcalls. If we count let's say 1 mesh draw call for each mesh section and 1 material draw call, that's 25 000 draw calls. The recommended amount is about 1500-2000 draw calls, but the smaller the number, the faster the scene will run. The debugger says 17 000 ray tracing instances, so it kind of matches up with the 17 000 .udsmesh files.So the easiest way to speed up the importing of the scene and the rendering of it is to merge the objects into reasonable amount of objects. For example, this shelf is made up of very little seperate piece, while it should be 1 mesh obviously. And the part I show with arrow has flickering too, so there is possibility that the mesh is even duplicated. Now, I feel like I remember that I checked this data earlier too last week and was kind of surprised that it is using .udsmesh files. Is it possible this house's files were modified recently and the previous version was more performant than this, due to using different file structure or less files, the objects were more merged?
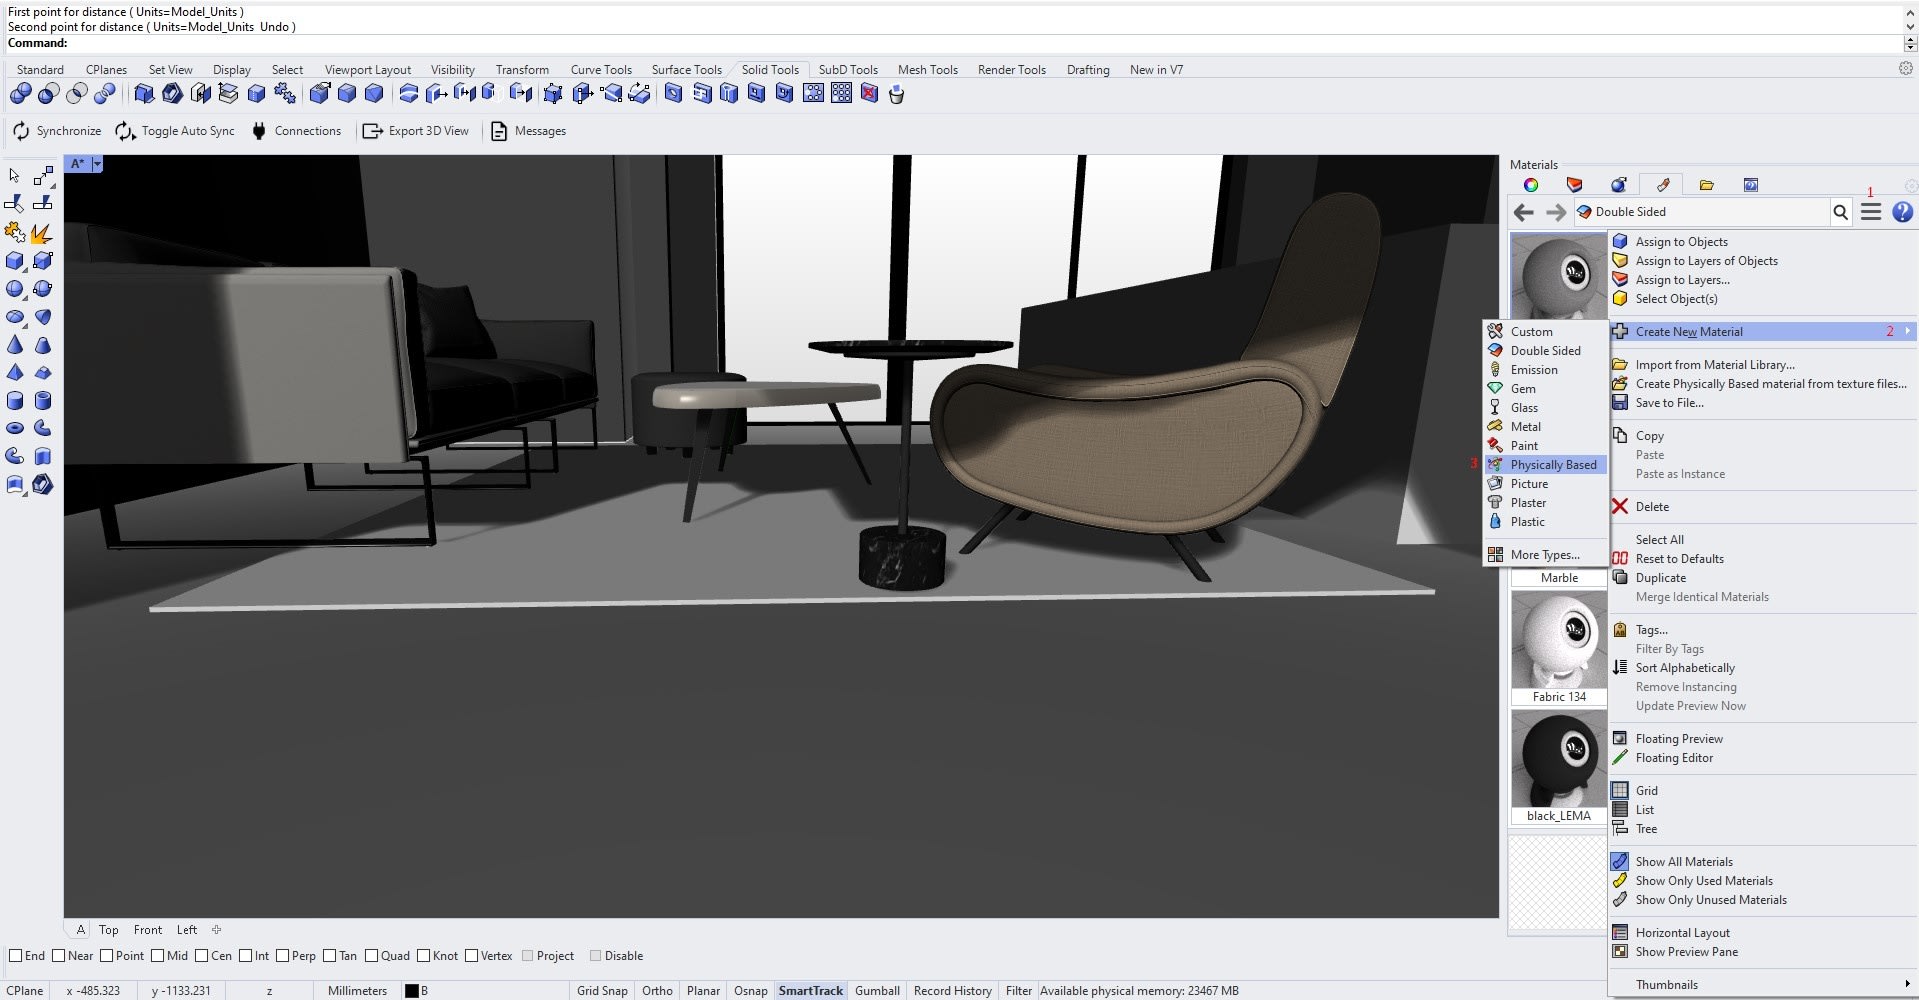
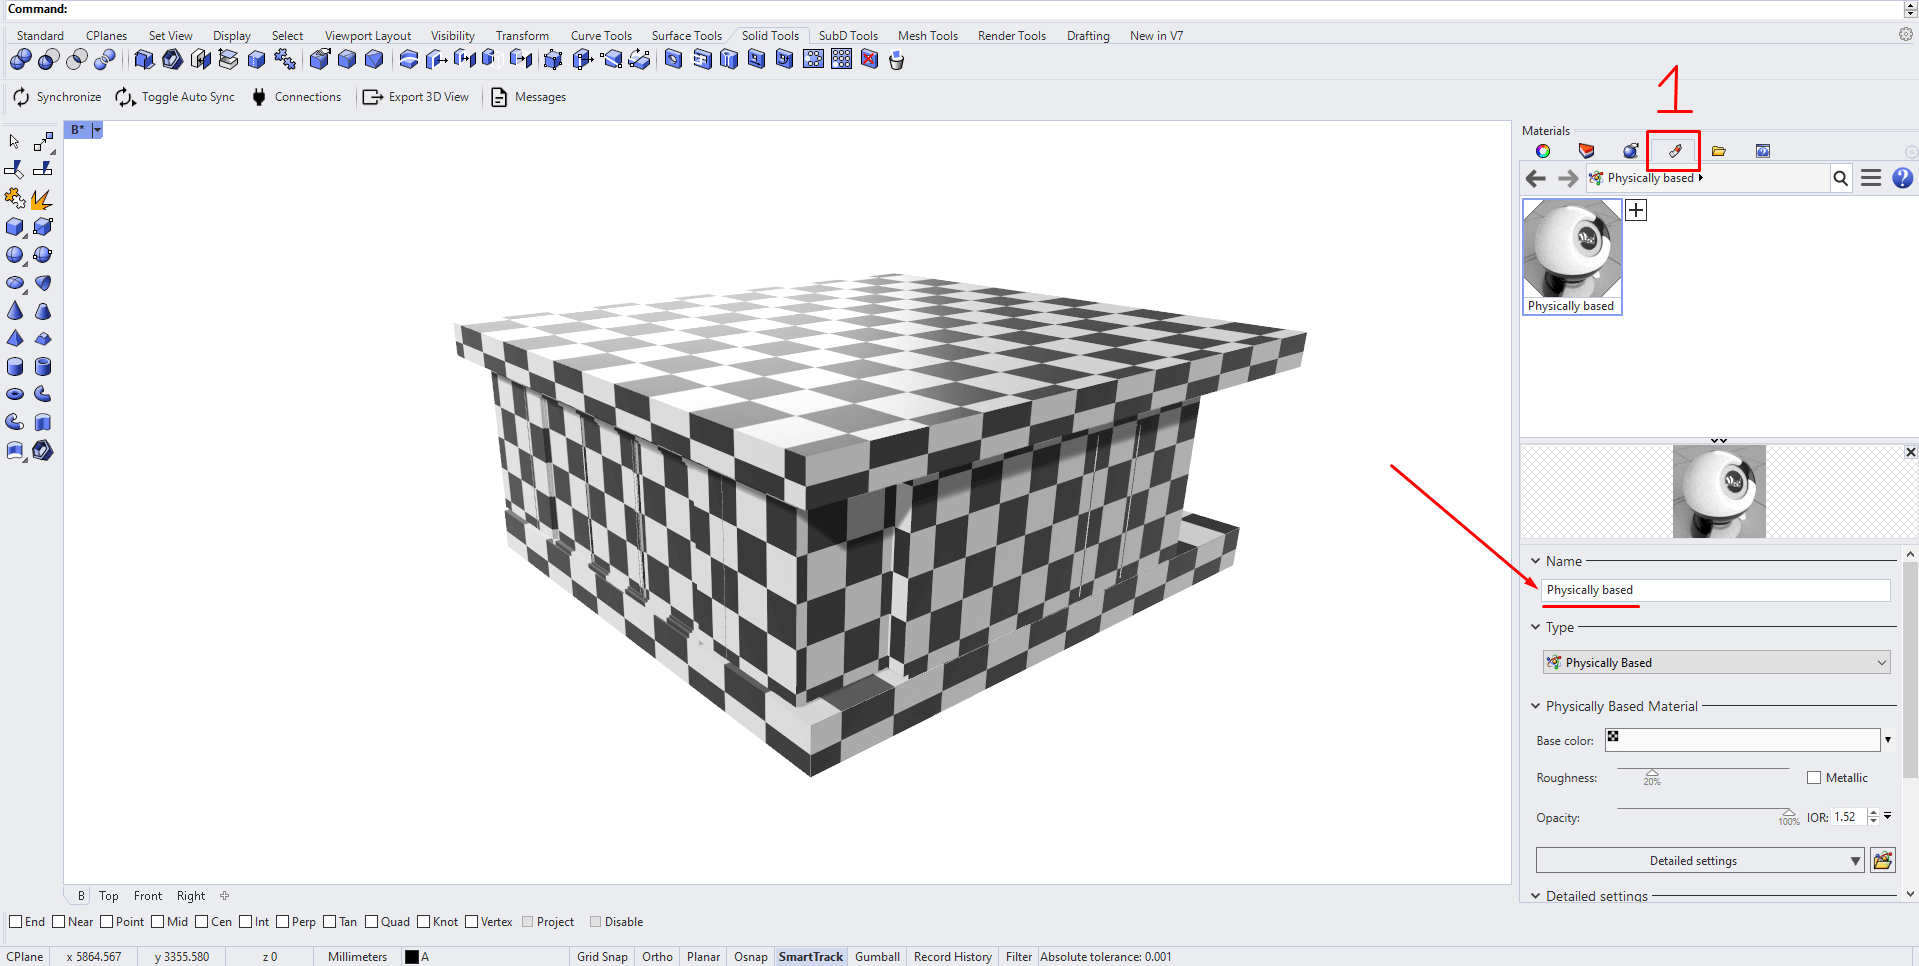
Create Physically based material
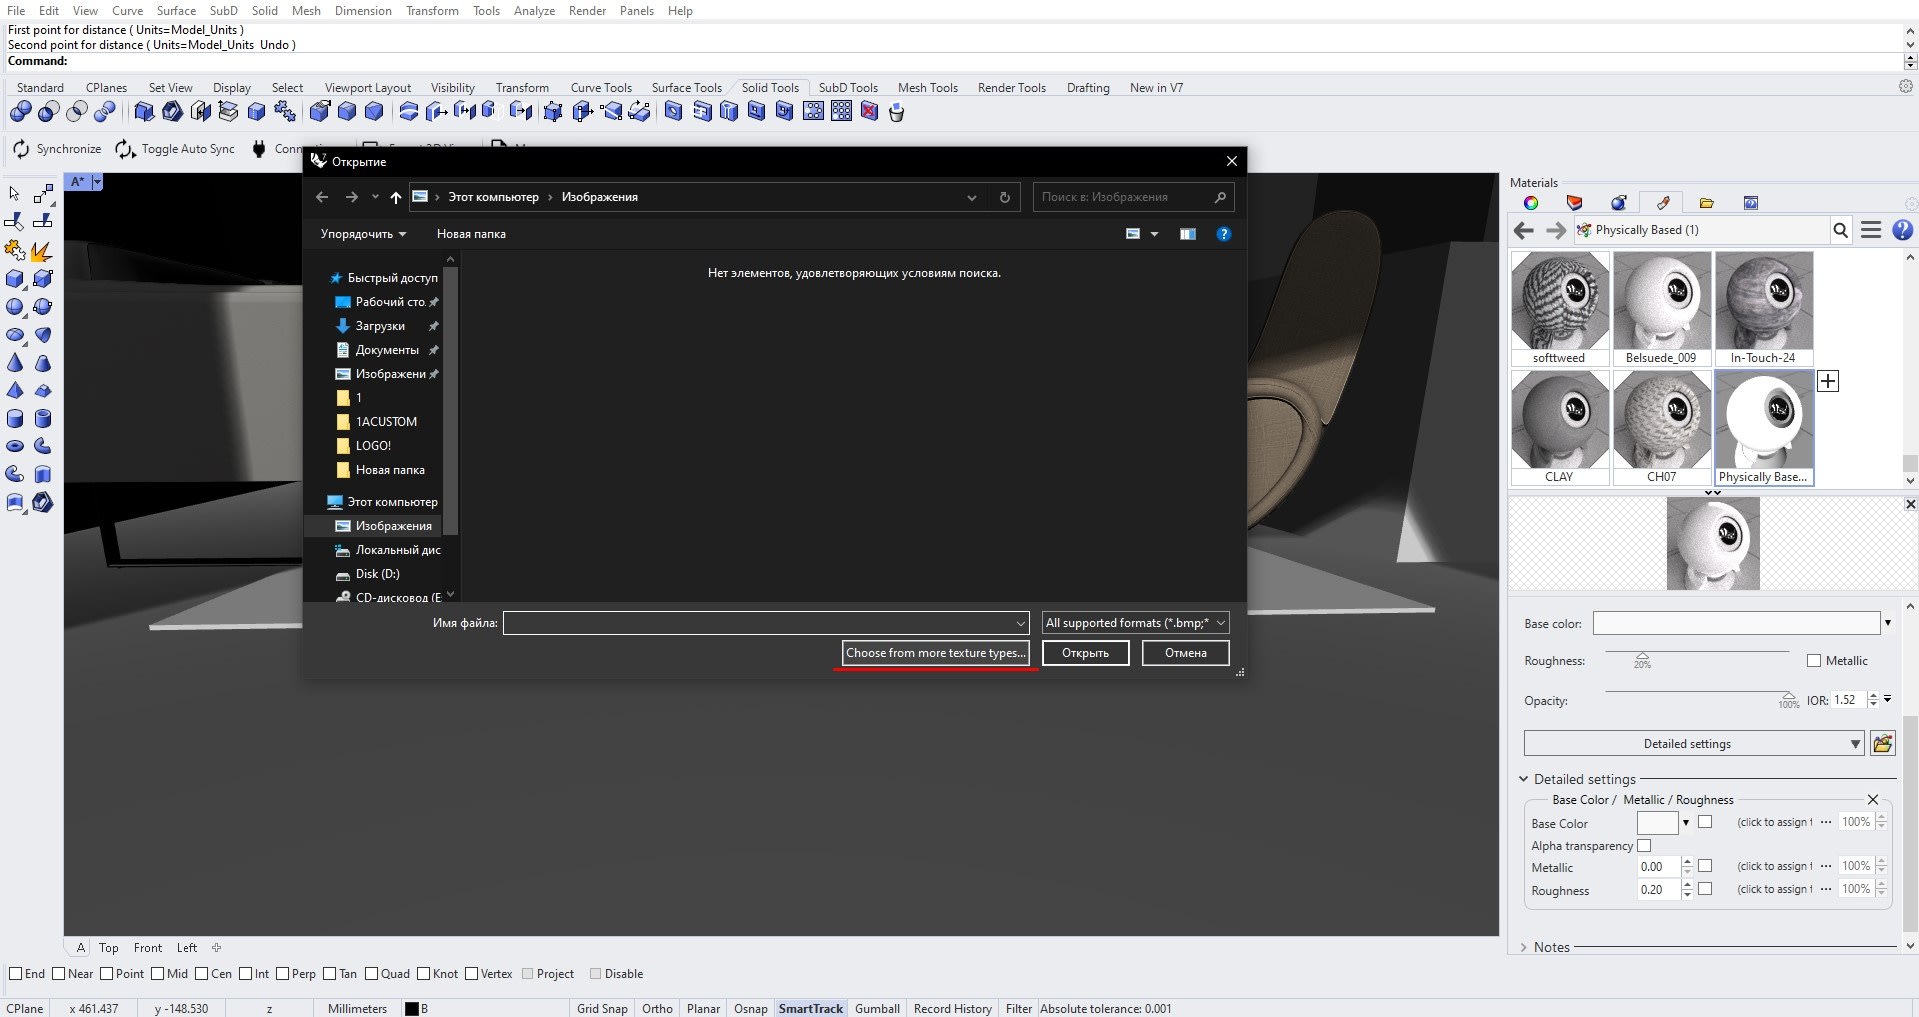
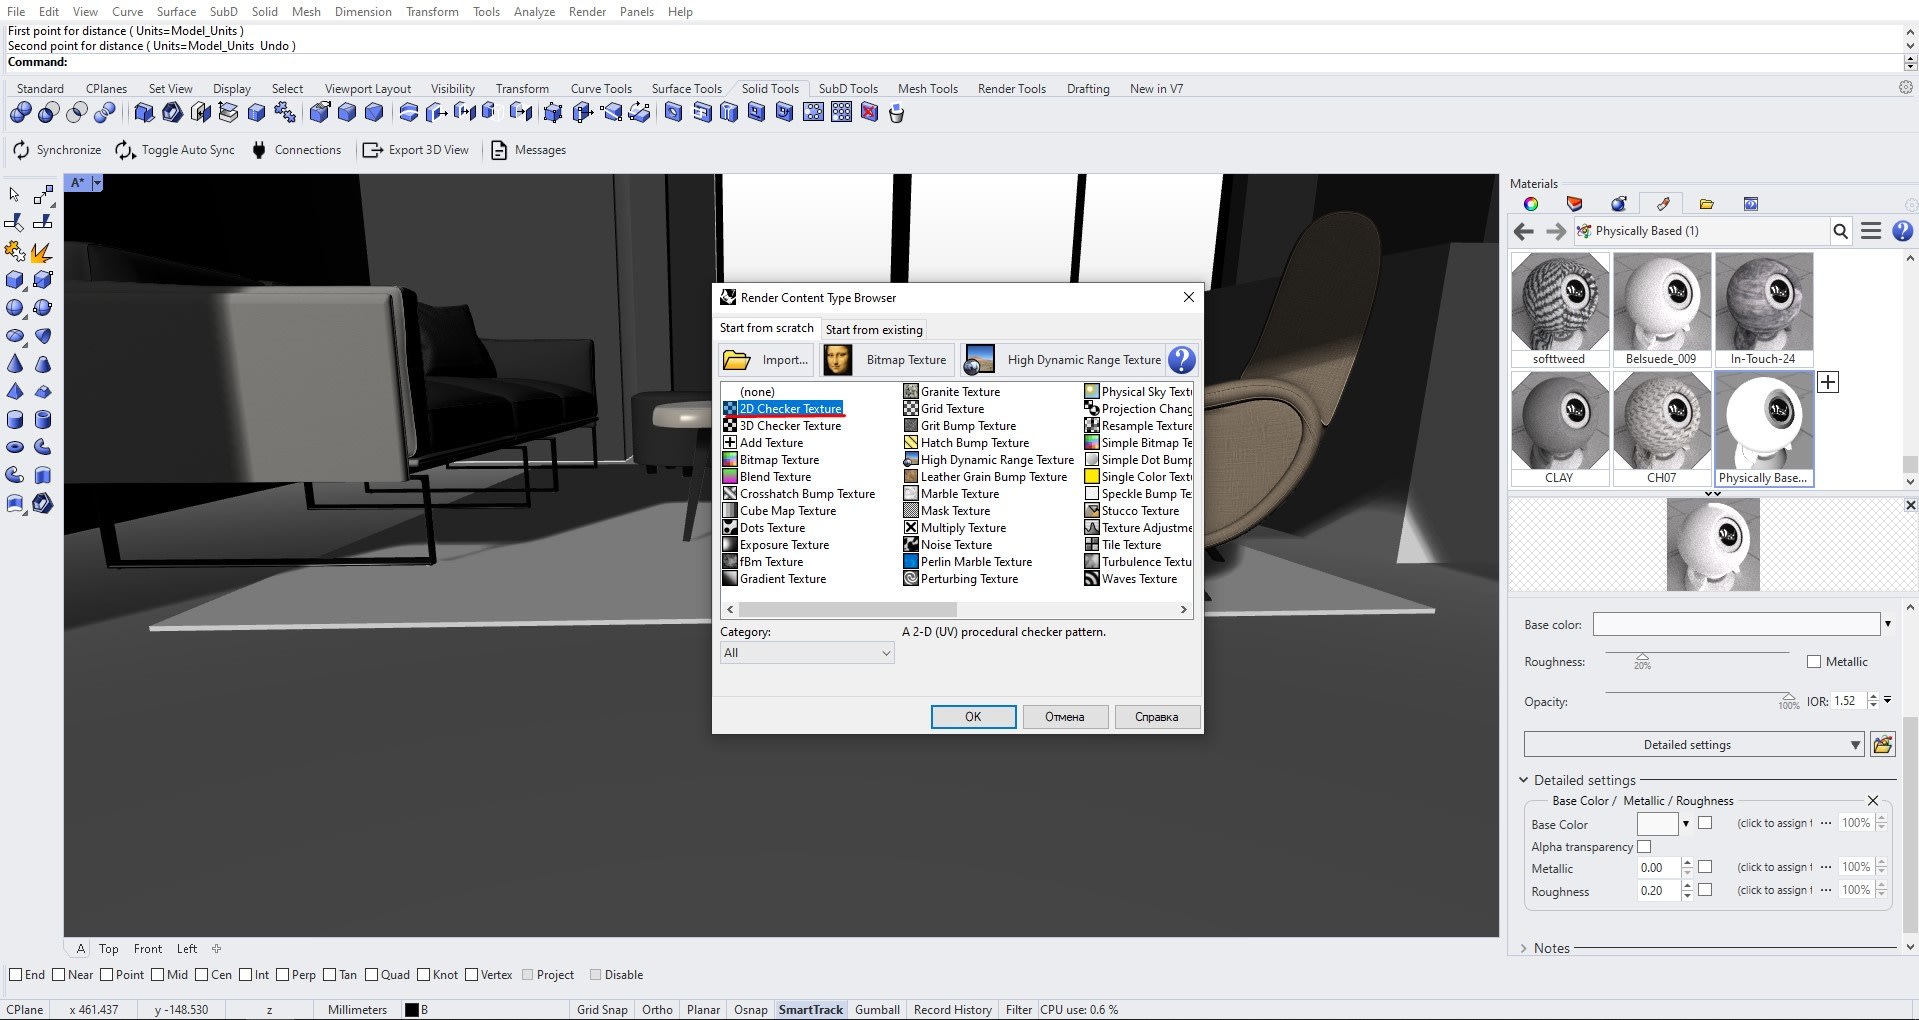
Select created material and assign 2D checker texture for it
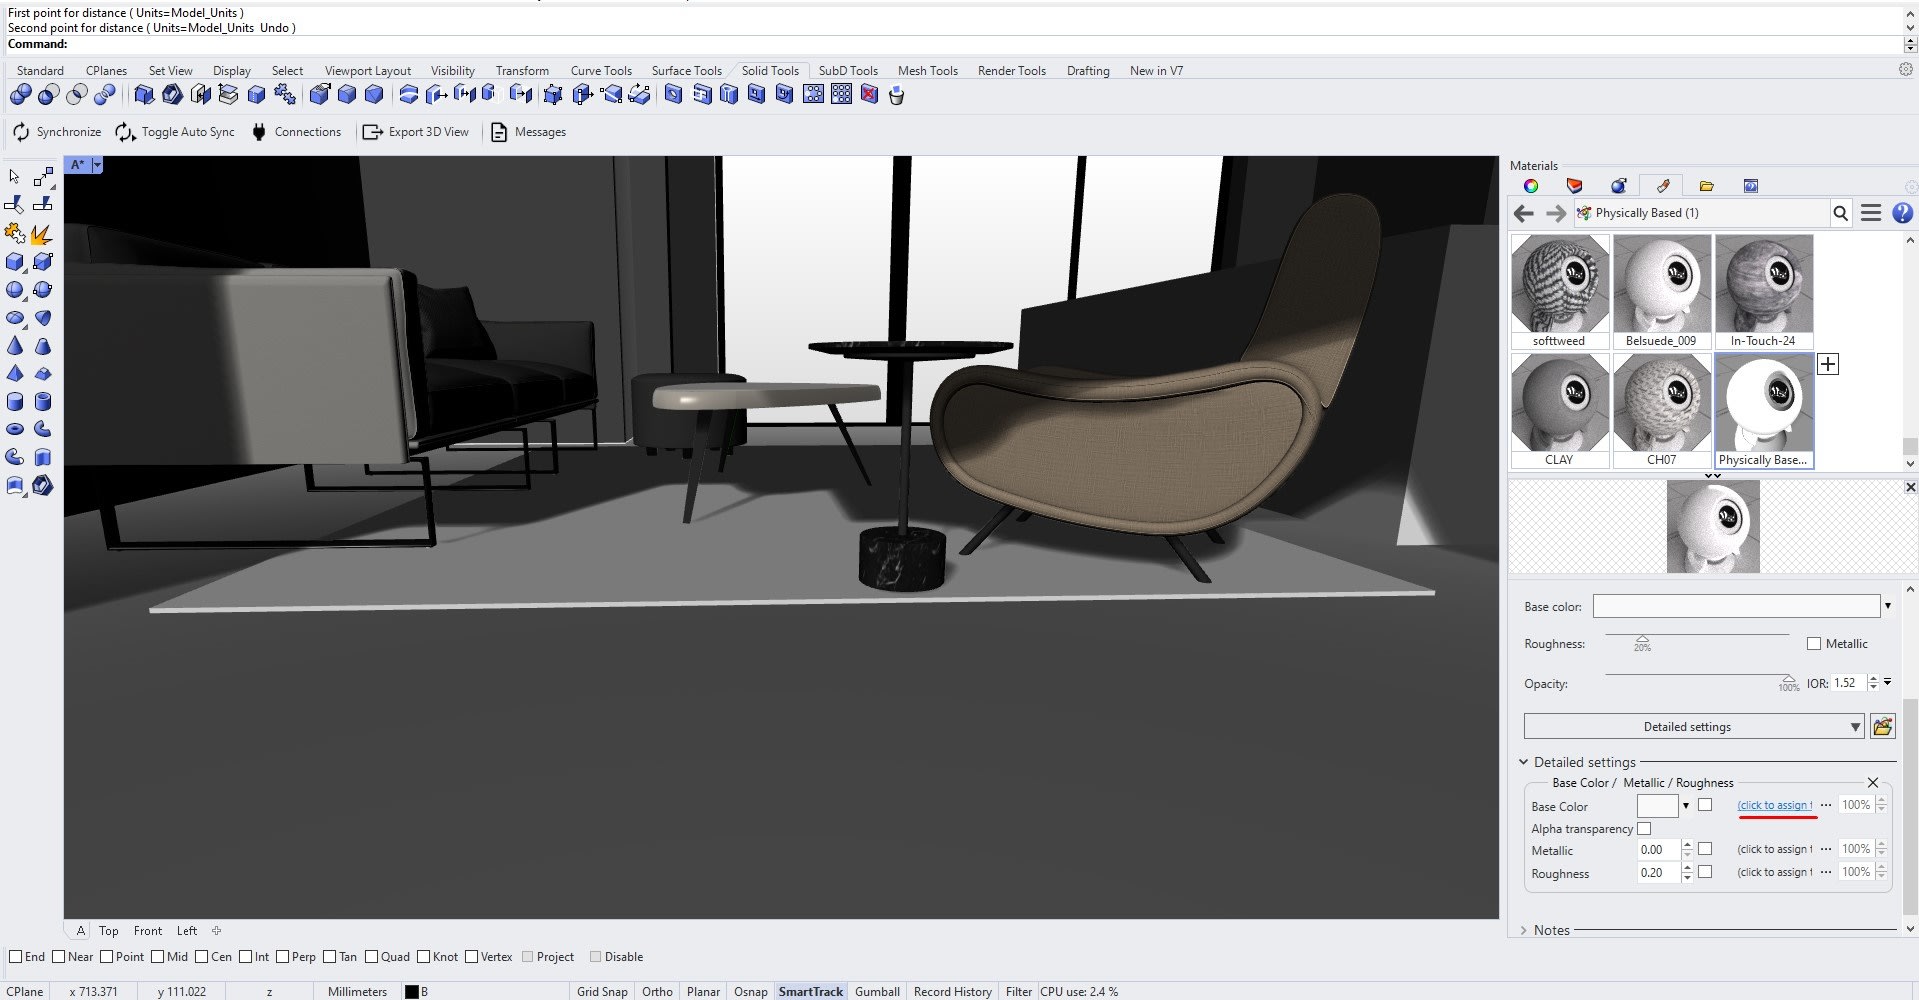
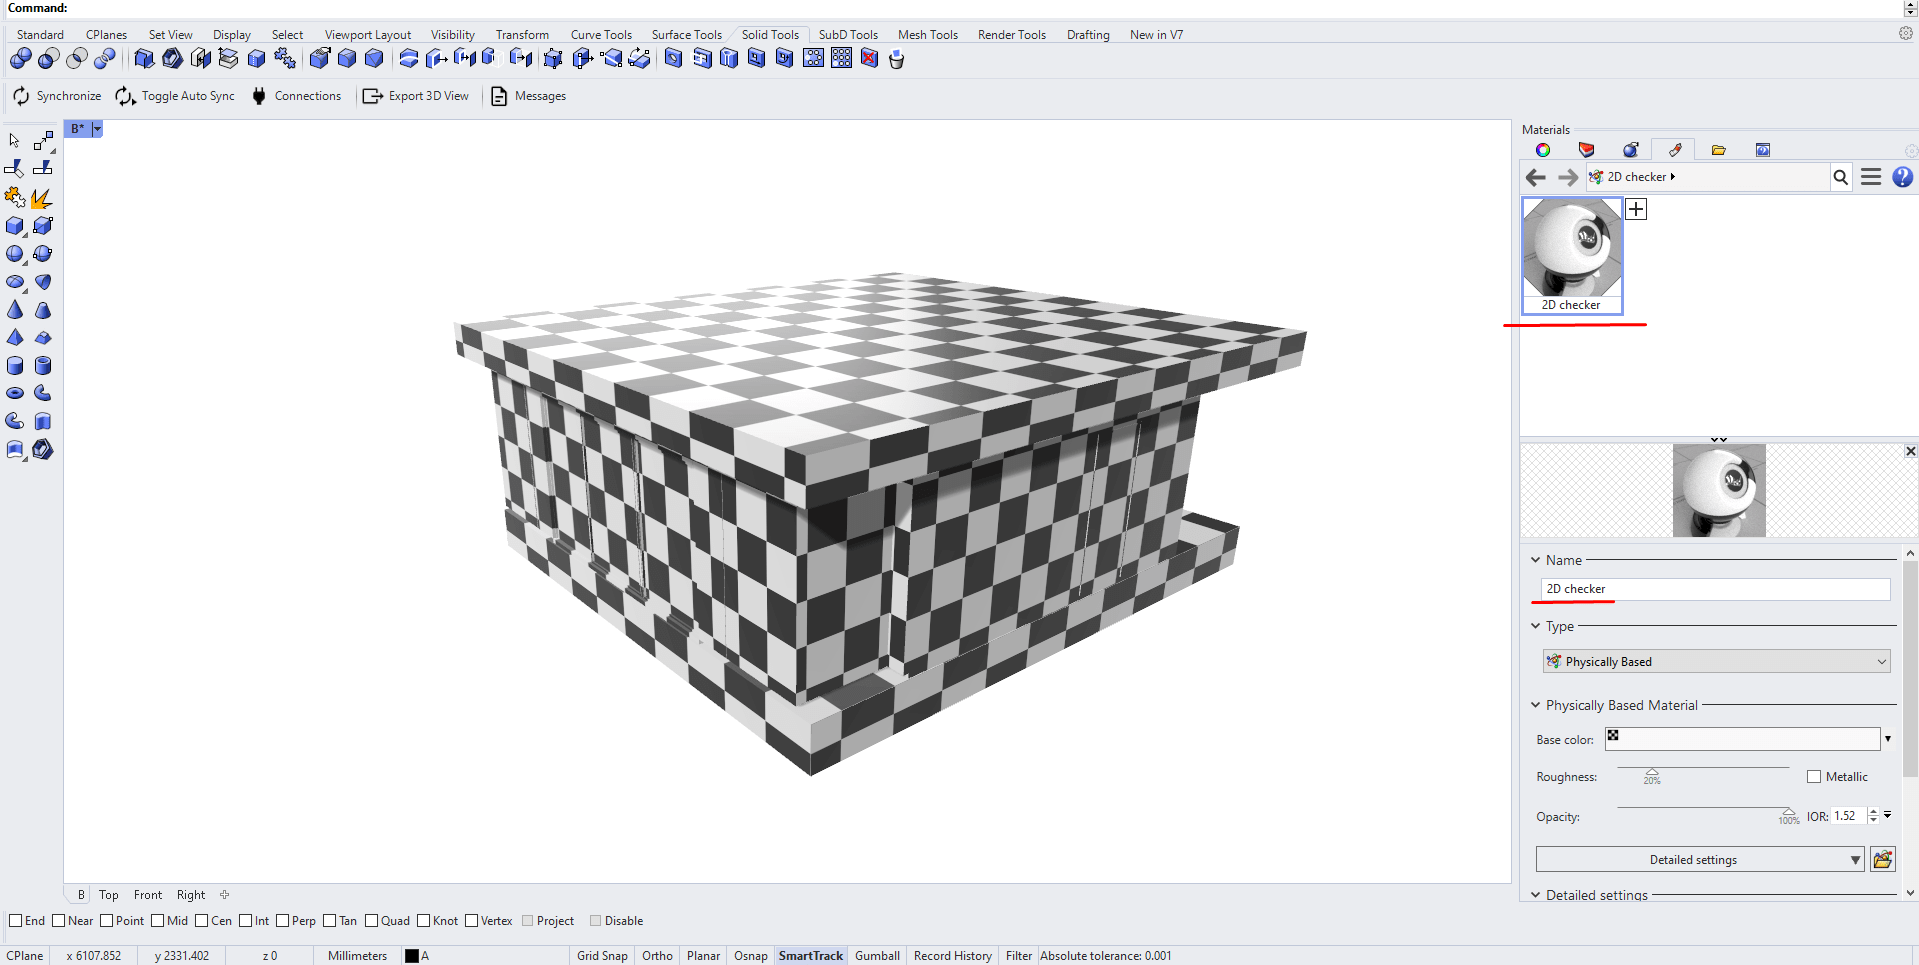
Name the created material as "2D Checker"
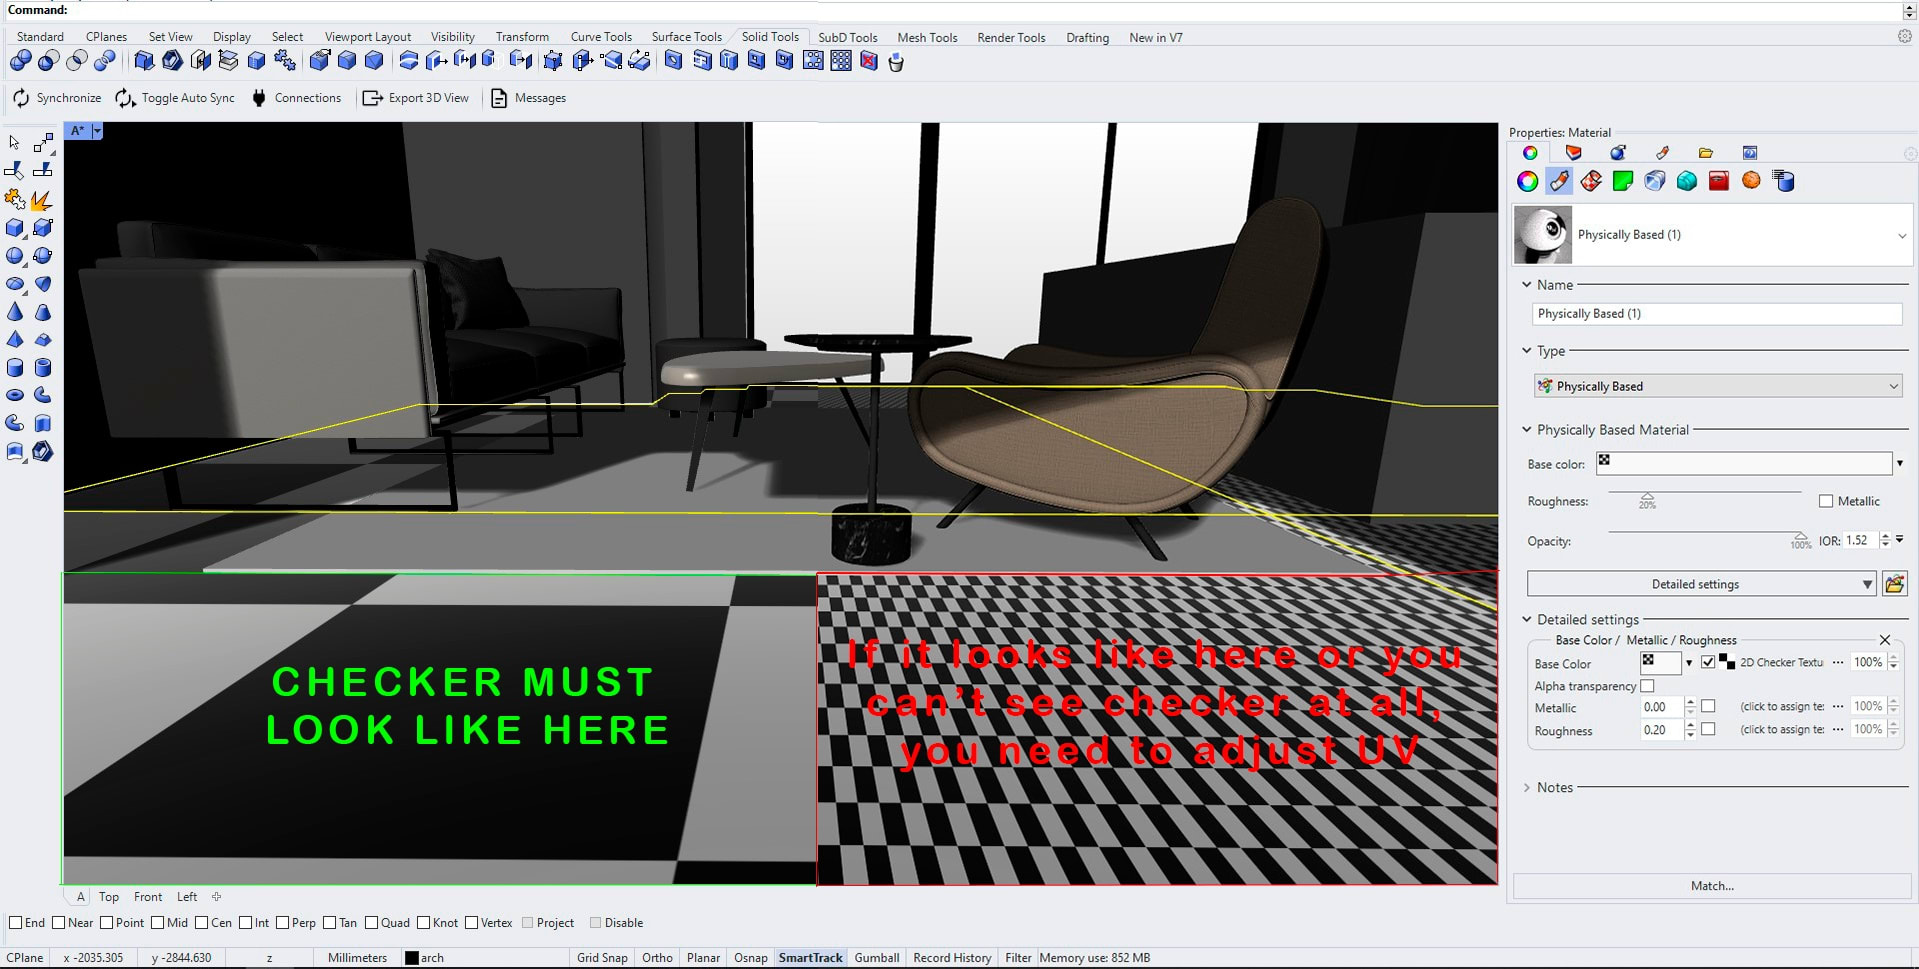
Assign material with 2D checker for objects which you want to check for UV
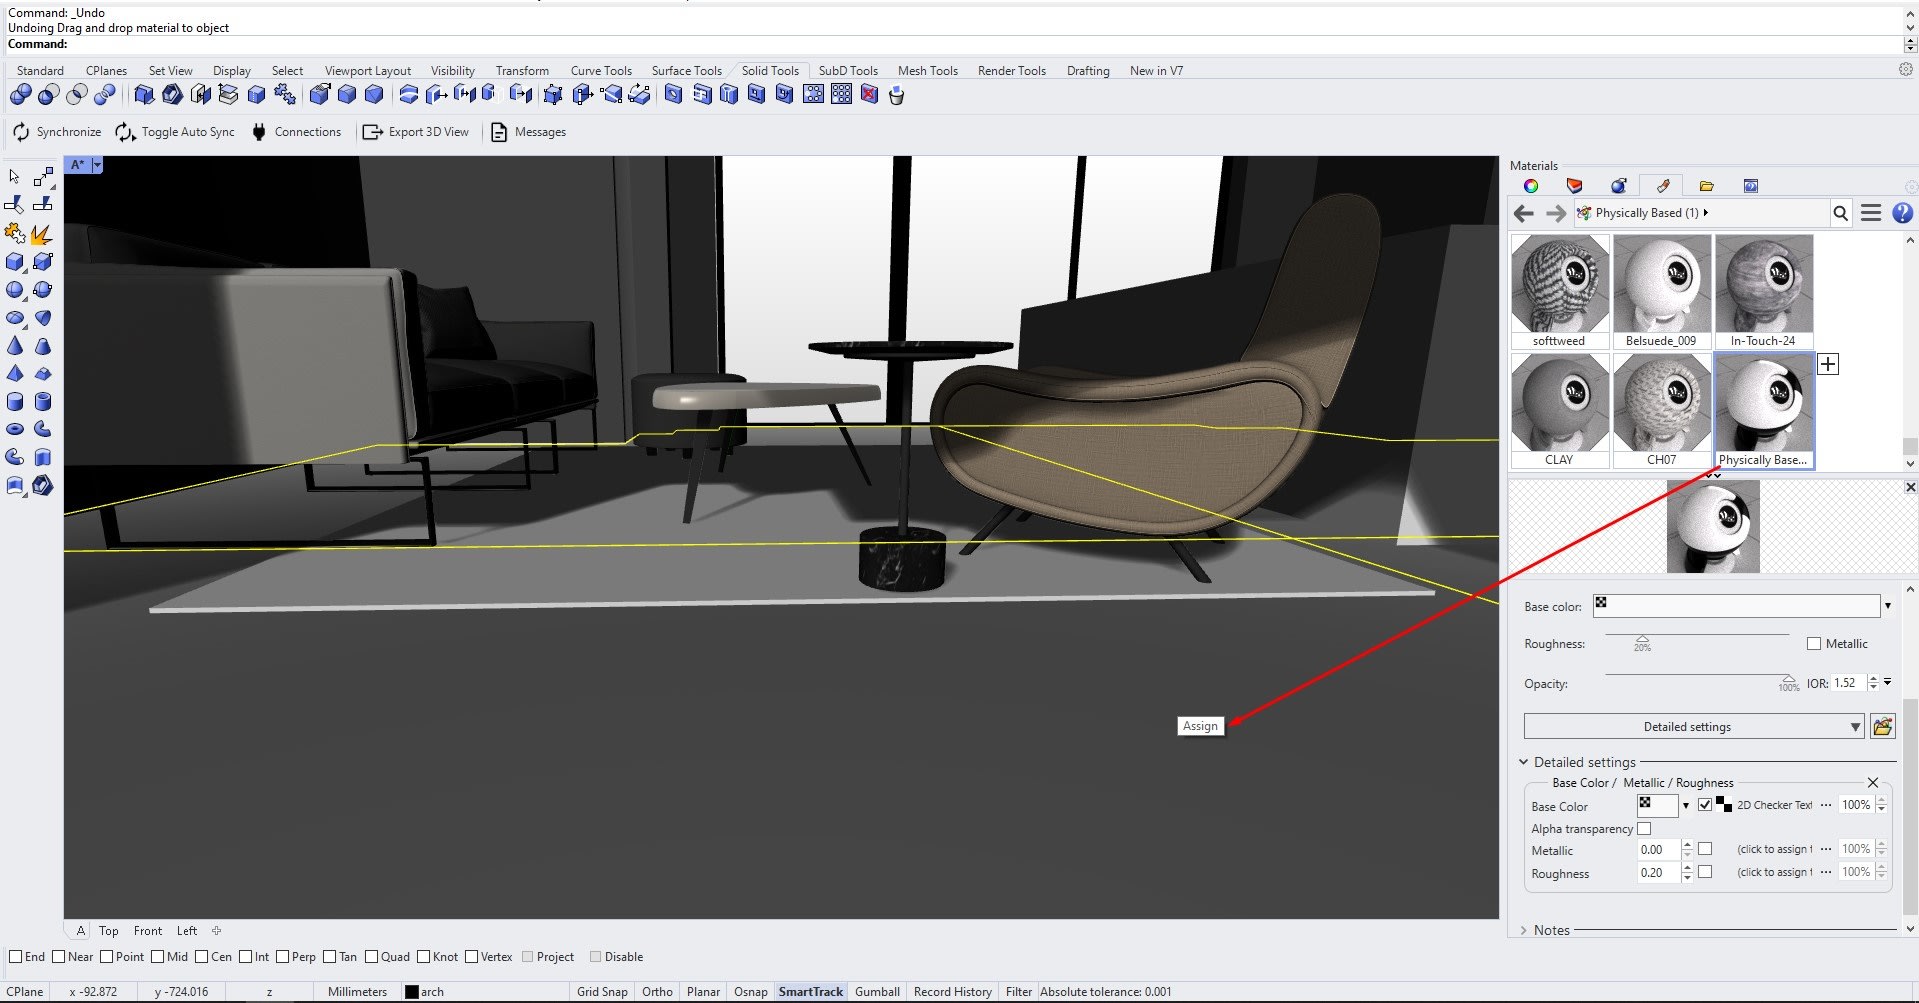
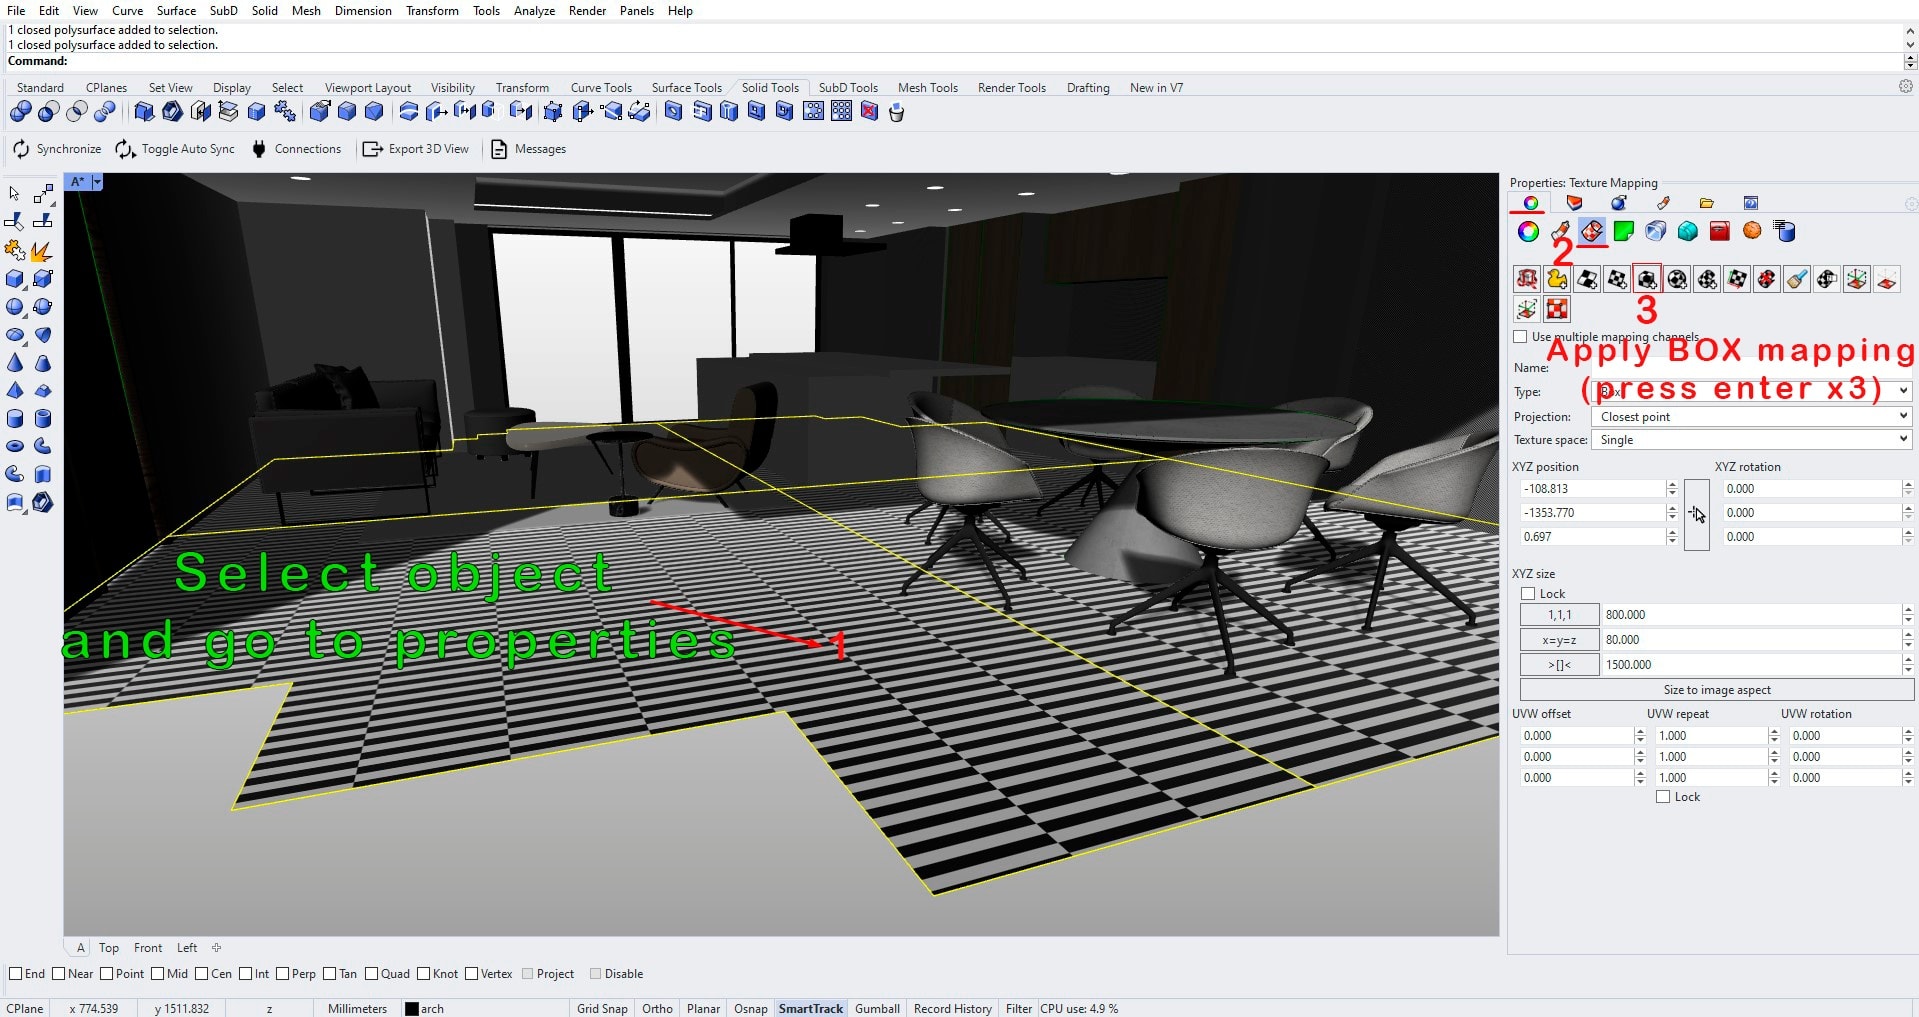
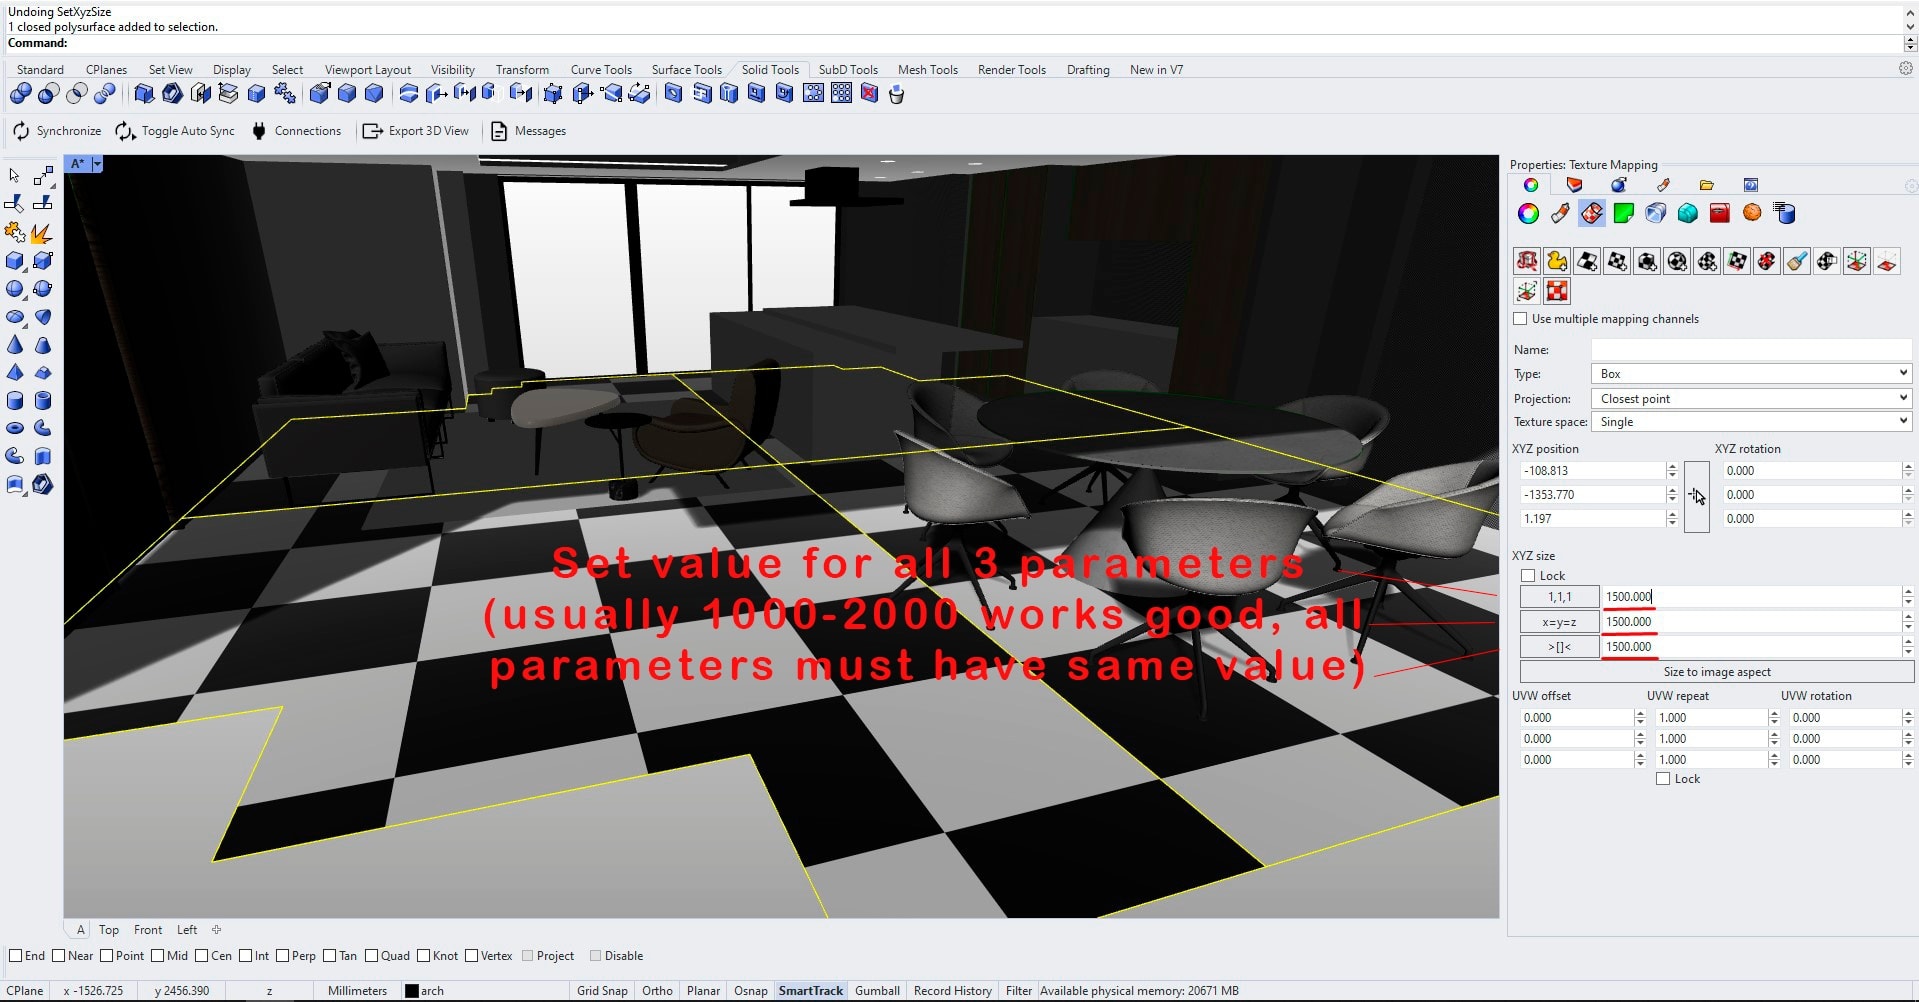
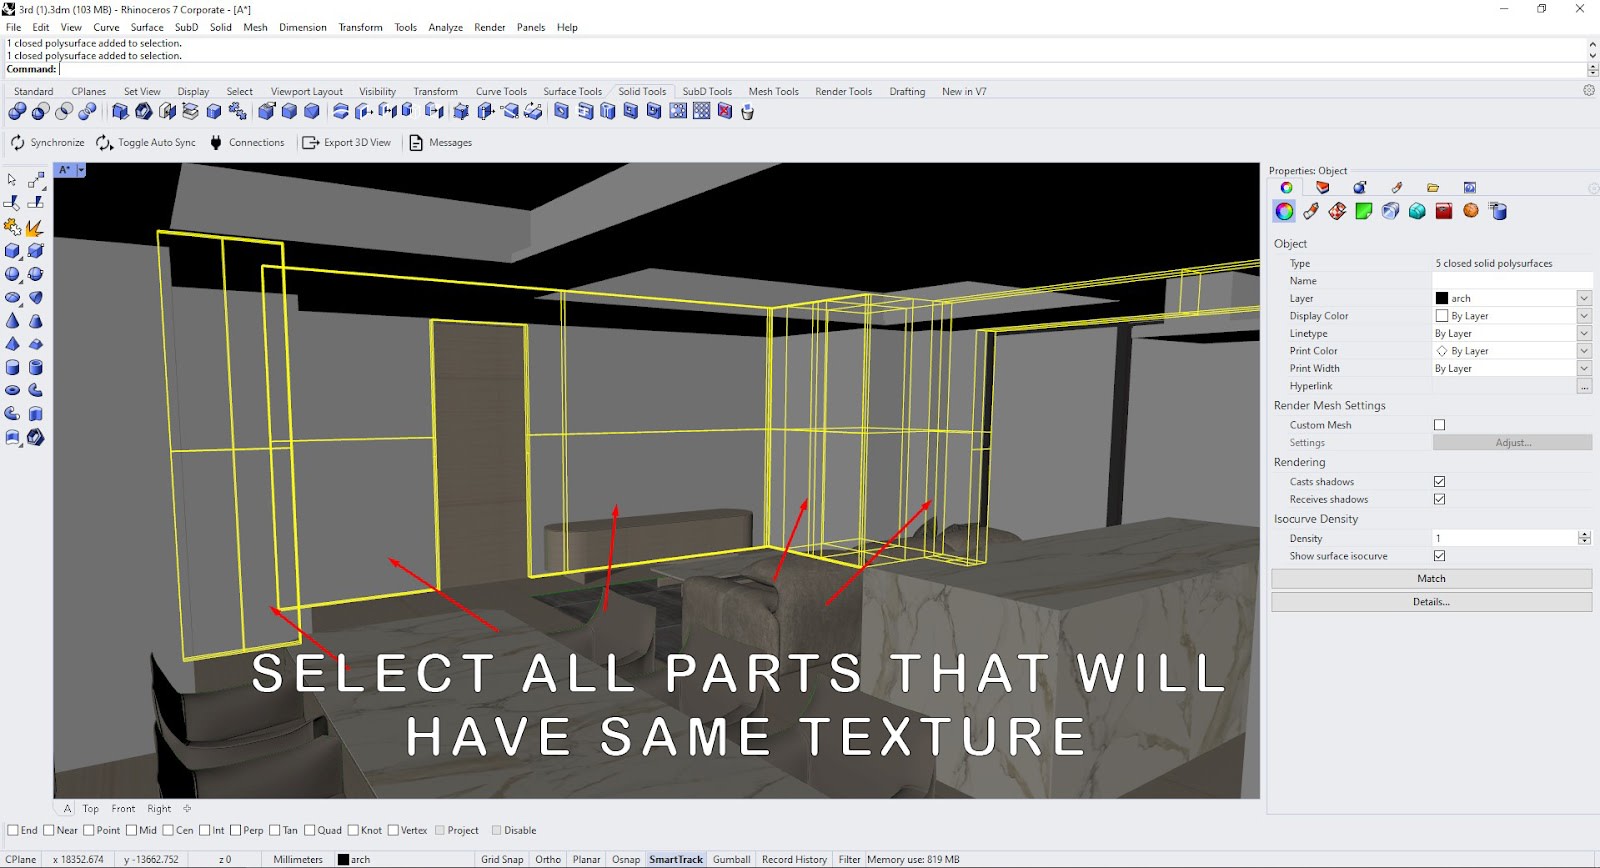
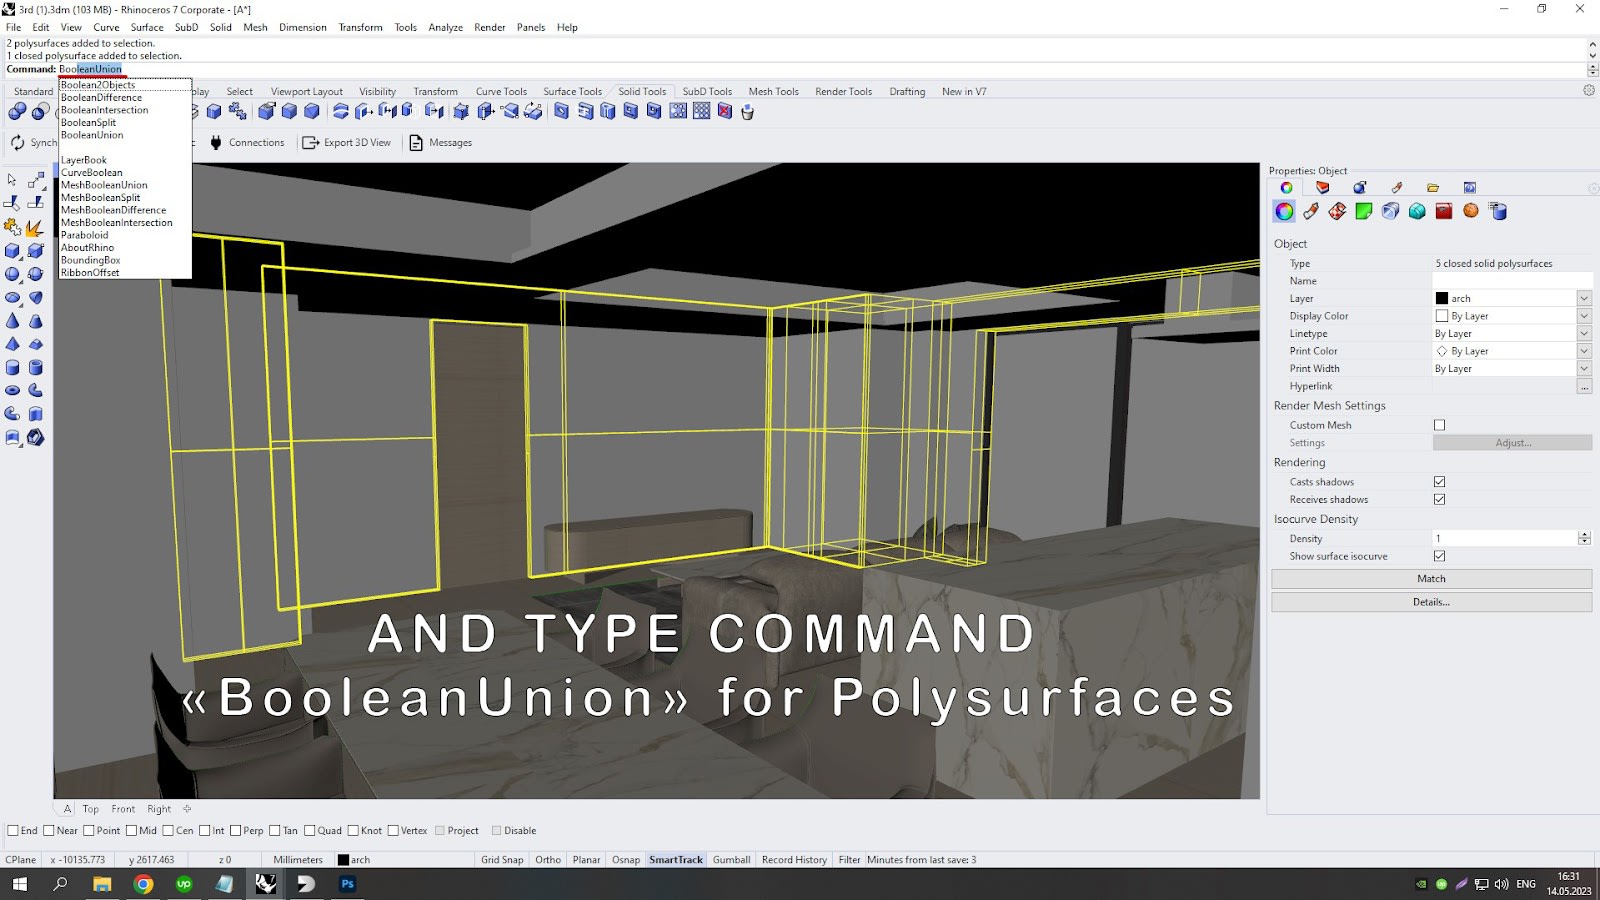
FOR POLYSURFACES:
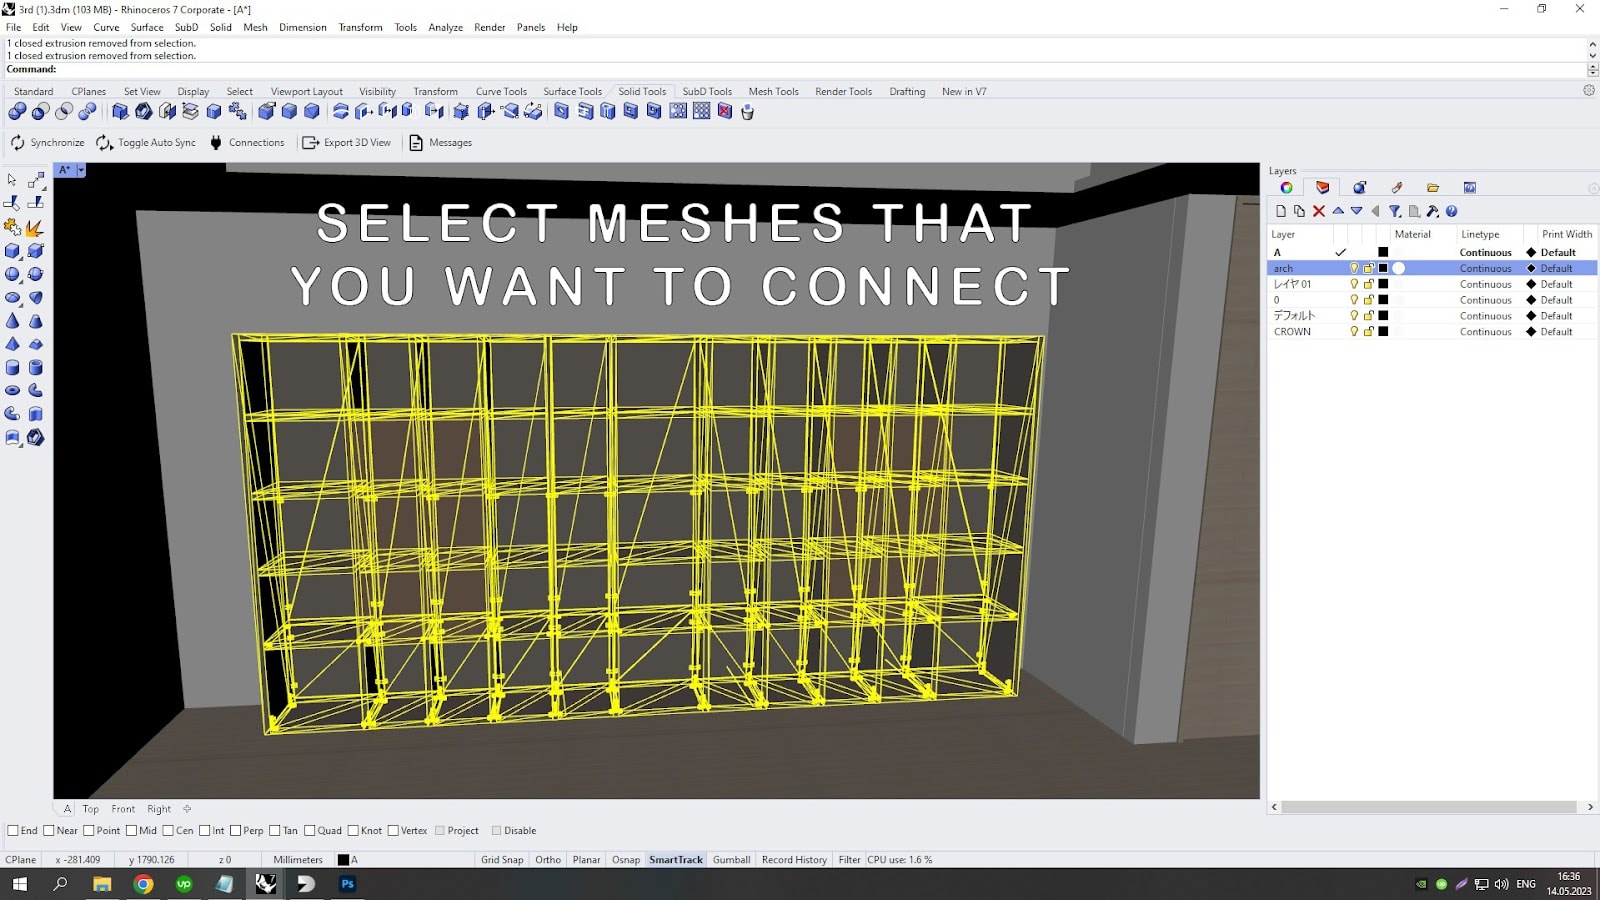
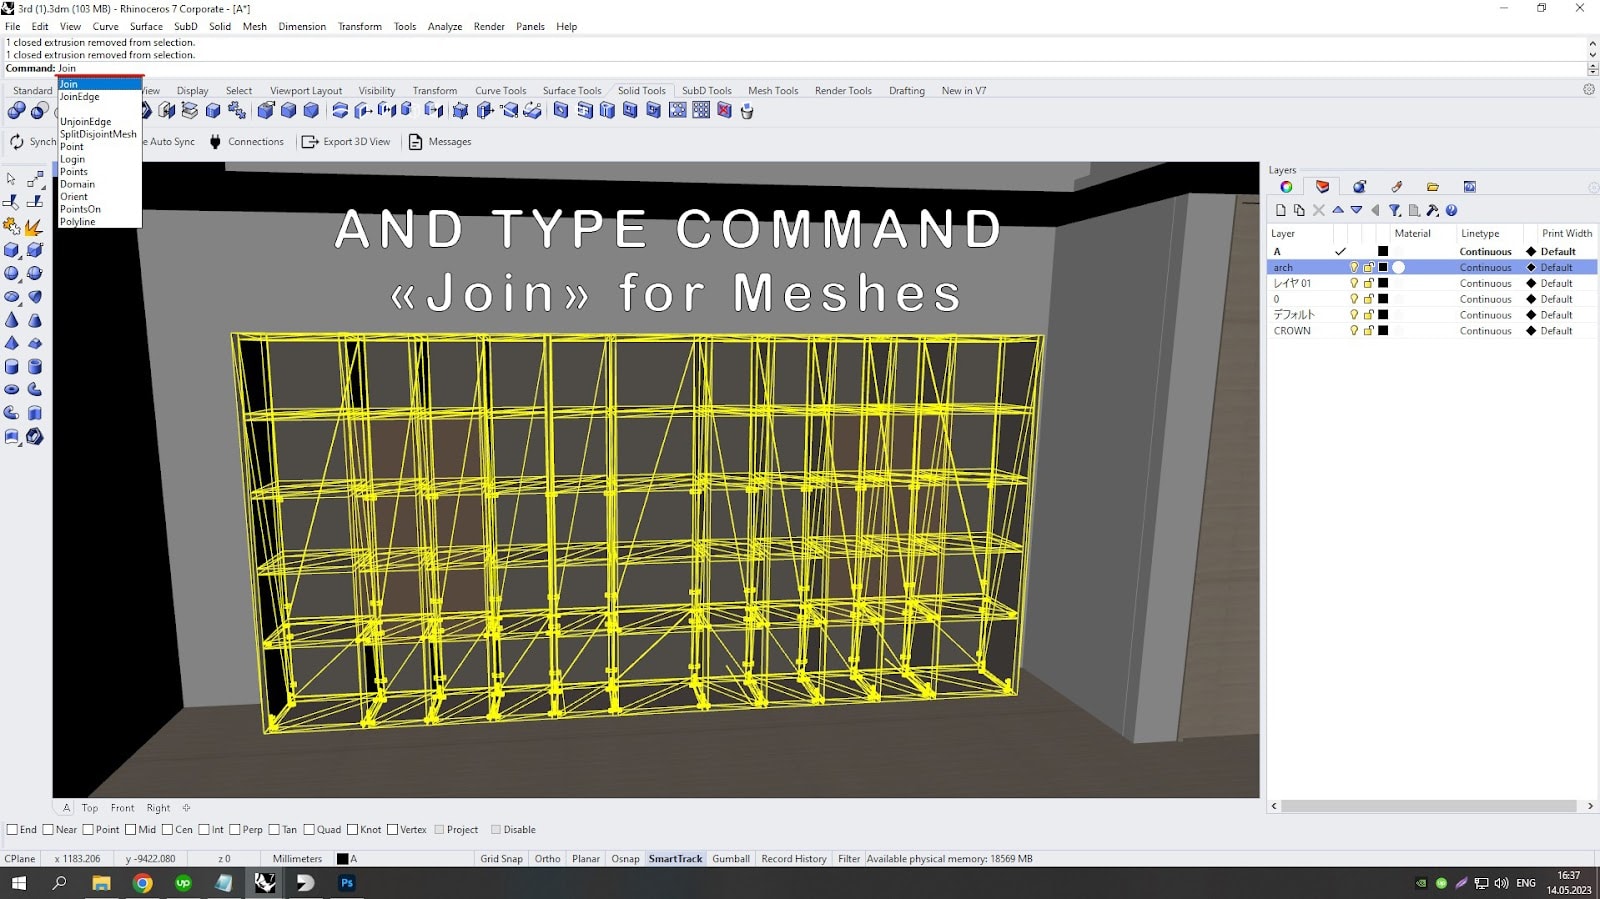
FOR MESHES:
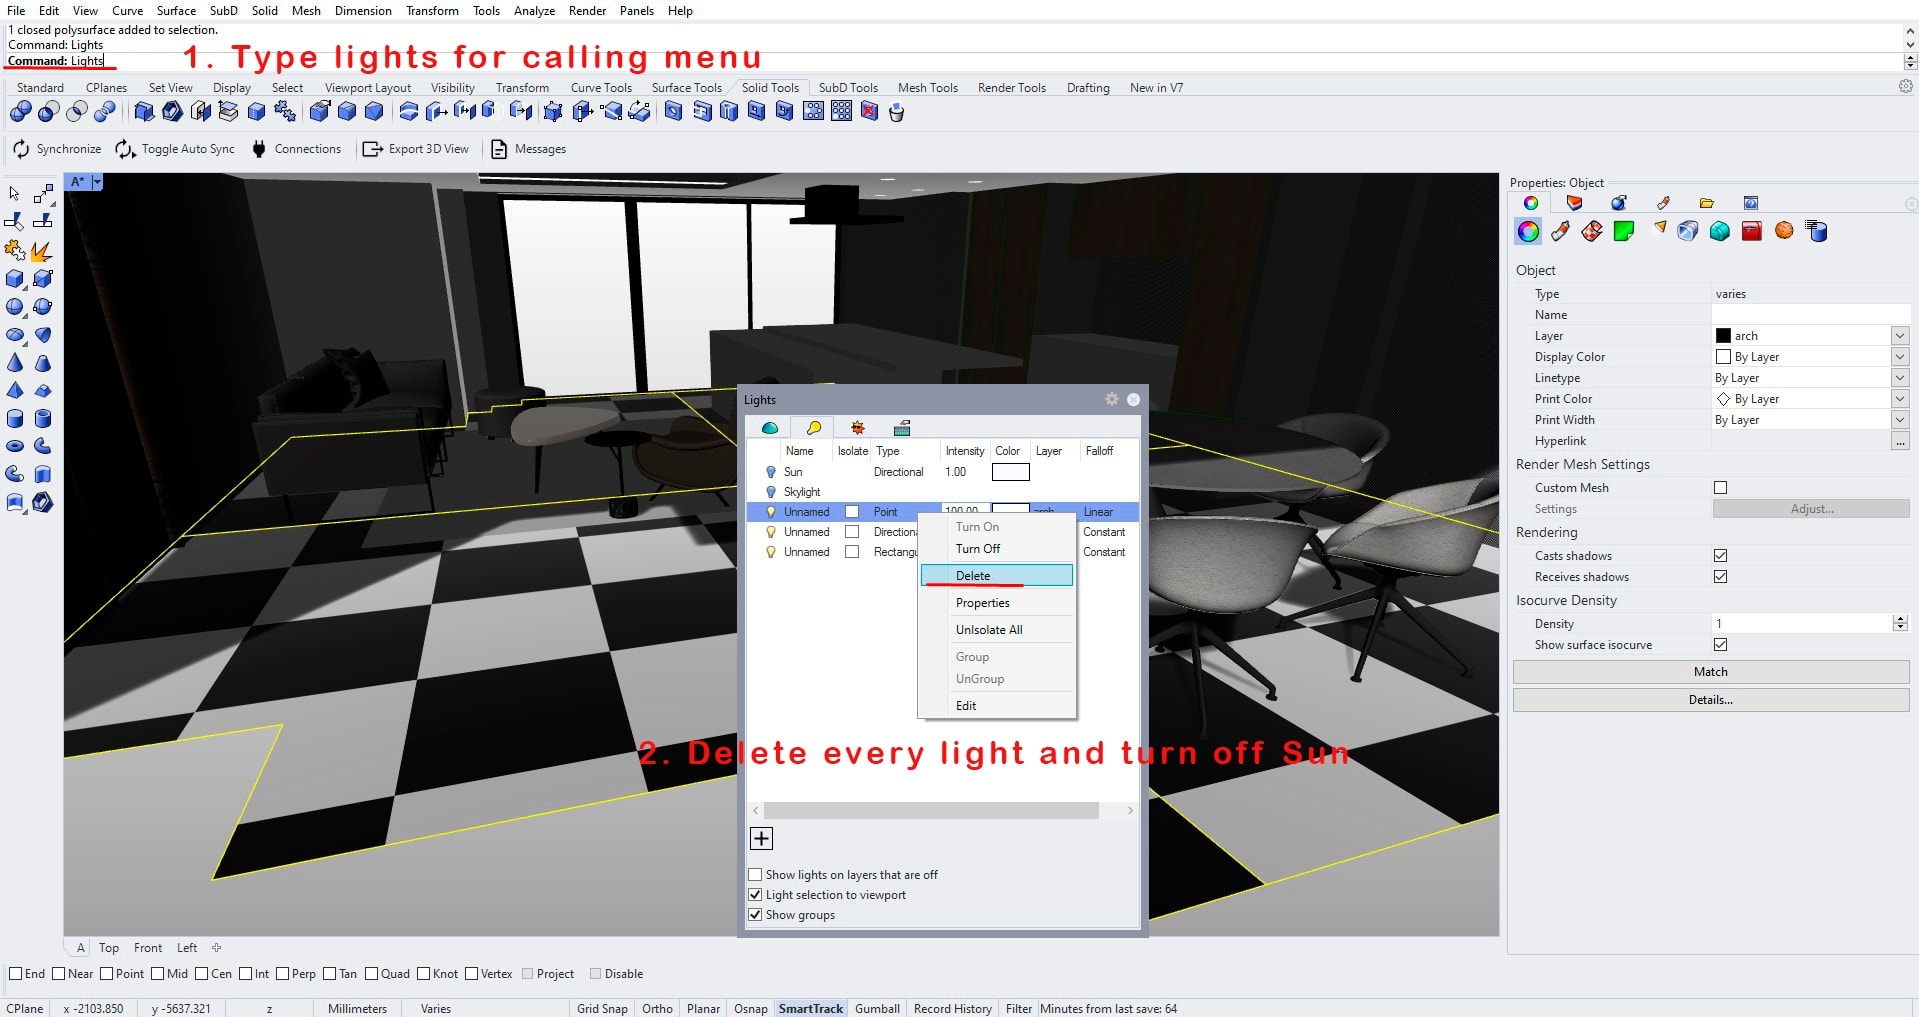
Delete every light from your scene before export (Rhino and Unreal Engine have different lightning systems that can conflict, to prevent it just remove any light from Rhino file before export)
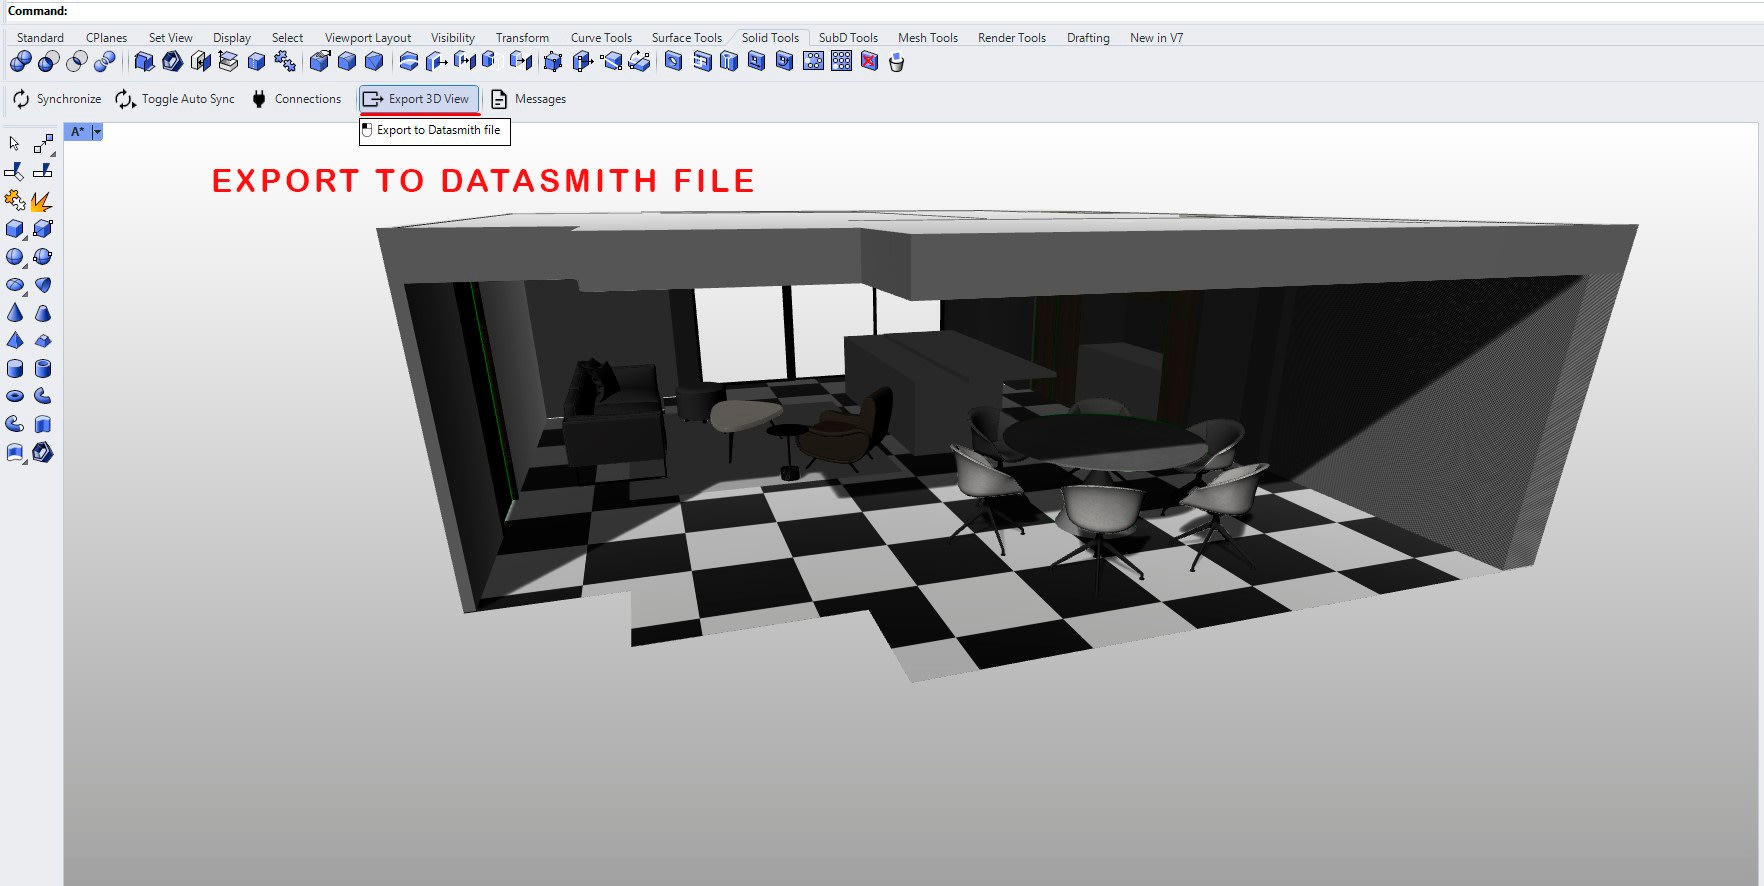
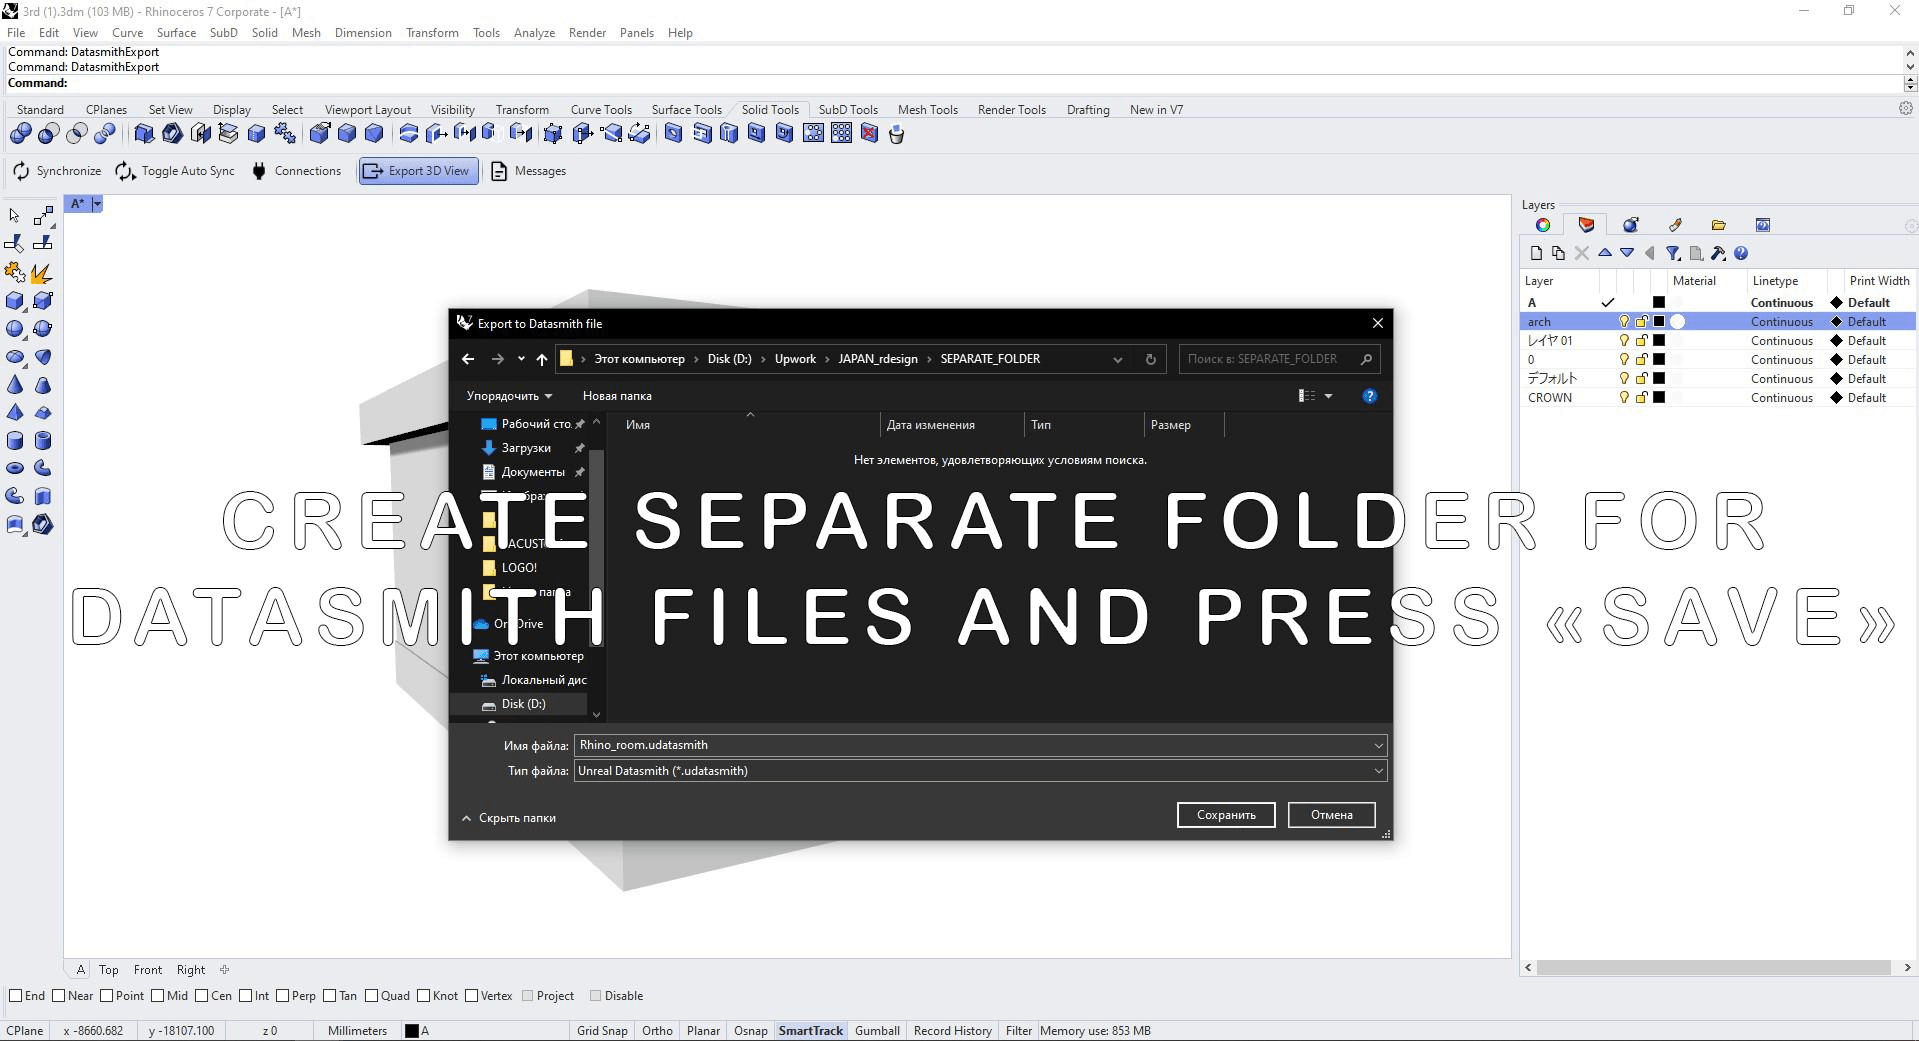
Export your 3d scene(object) to datasmith file and save it.
Open R.Design software and import your 3d scene or object.
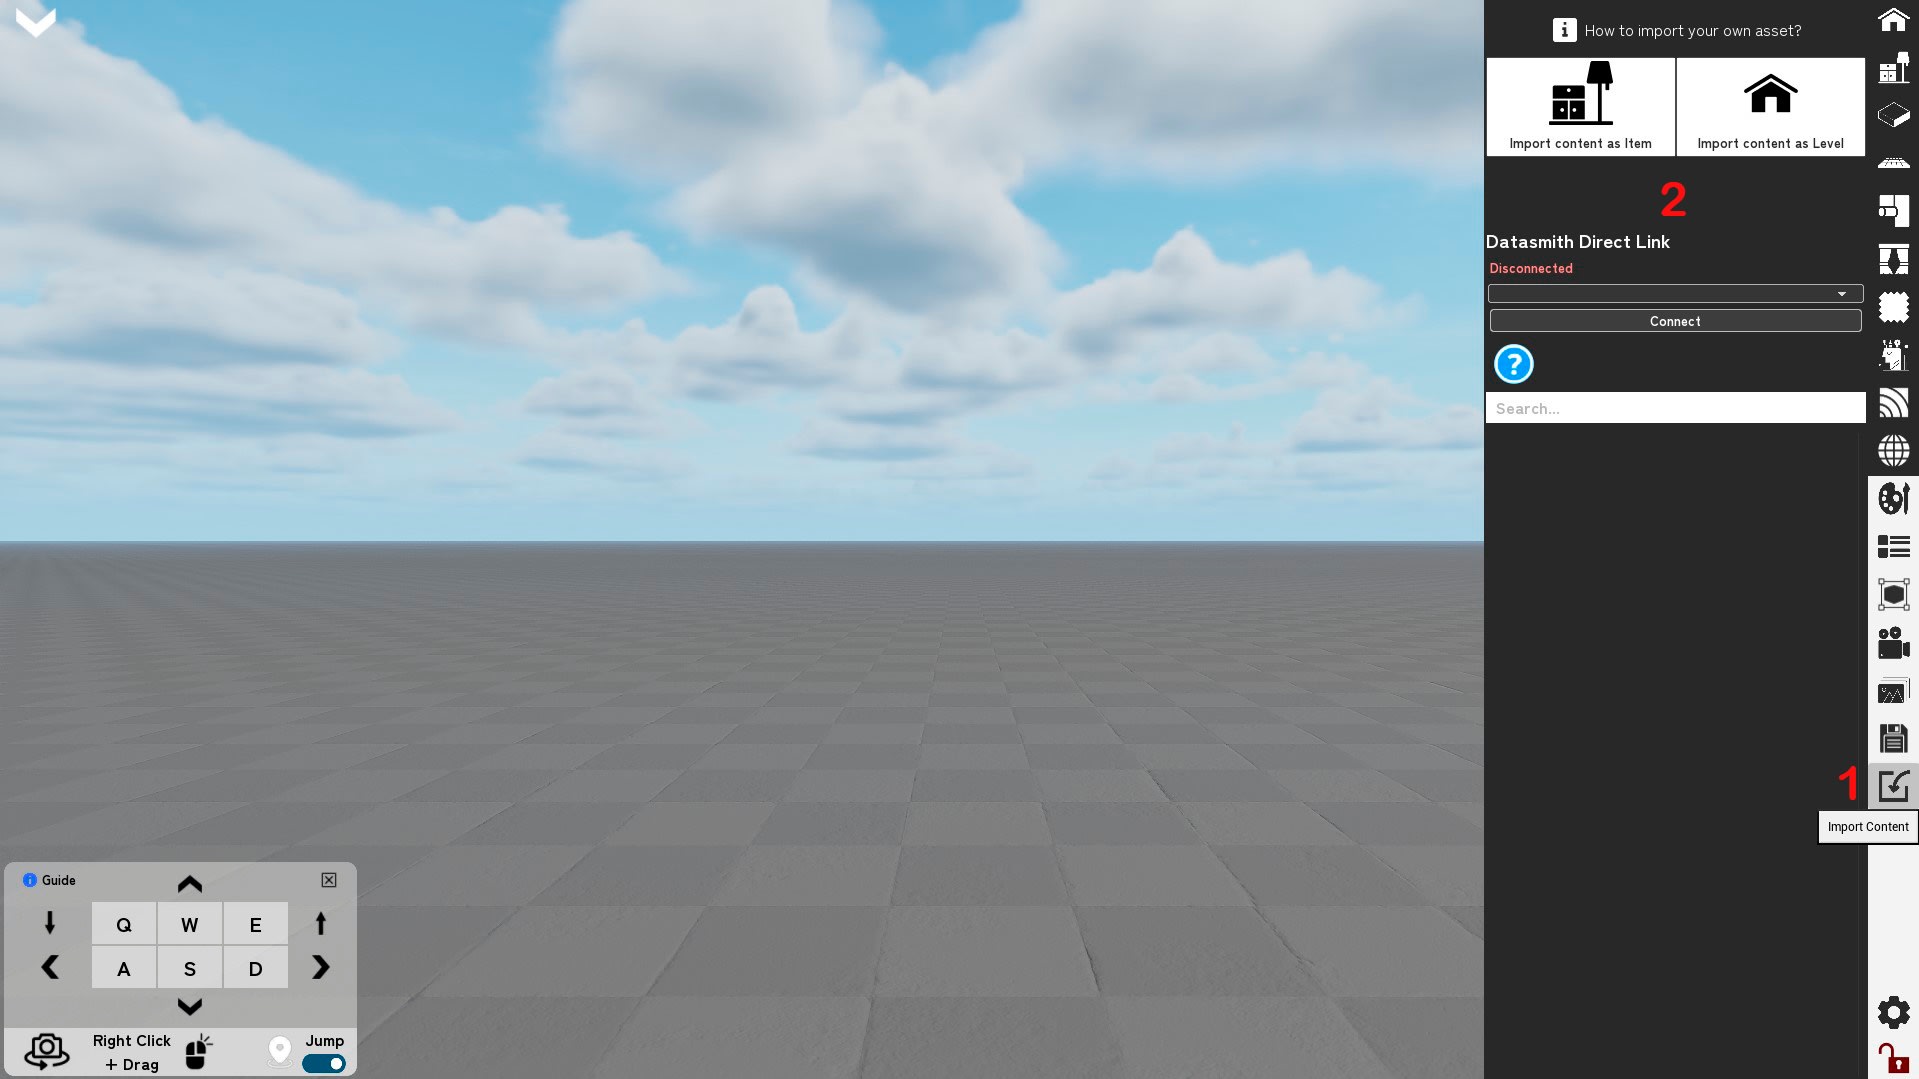
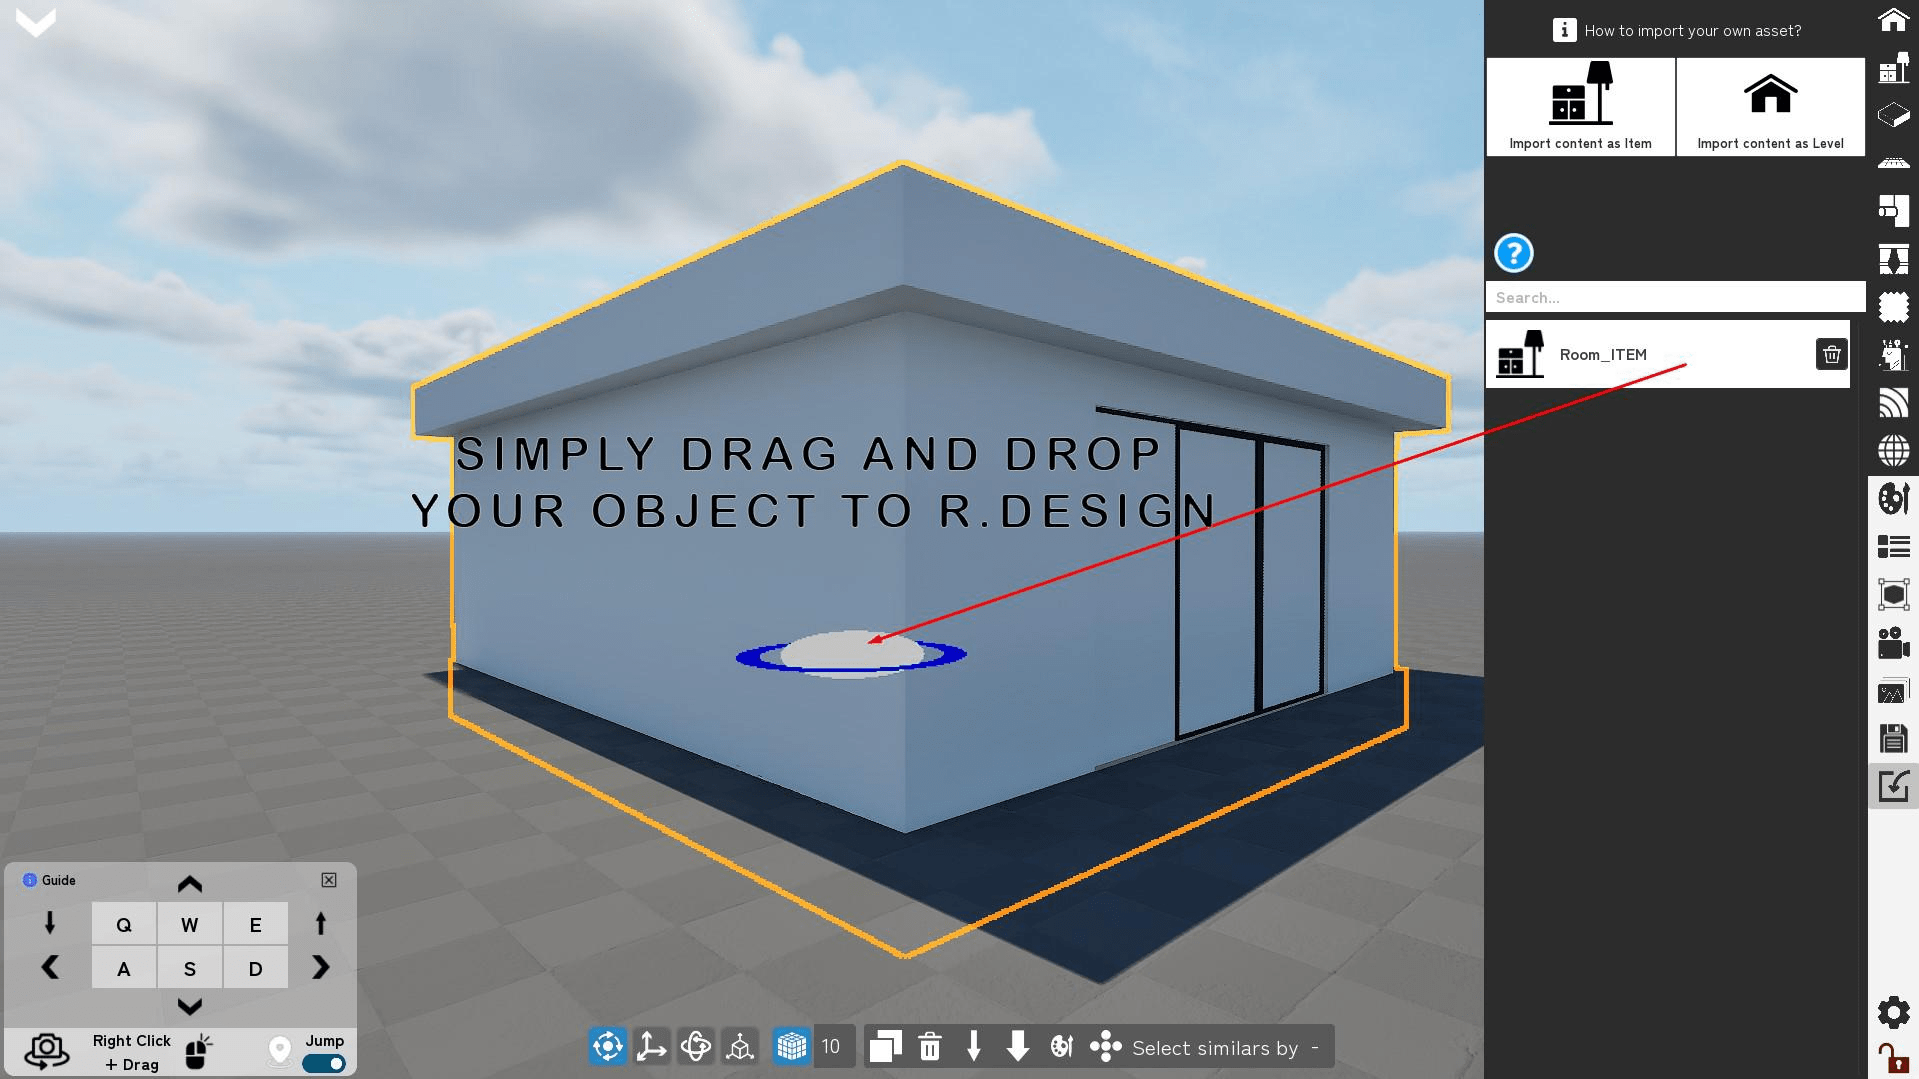
Step 10: Open R.Design software and import your 3d object as Item.
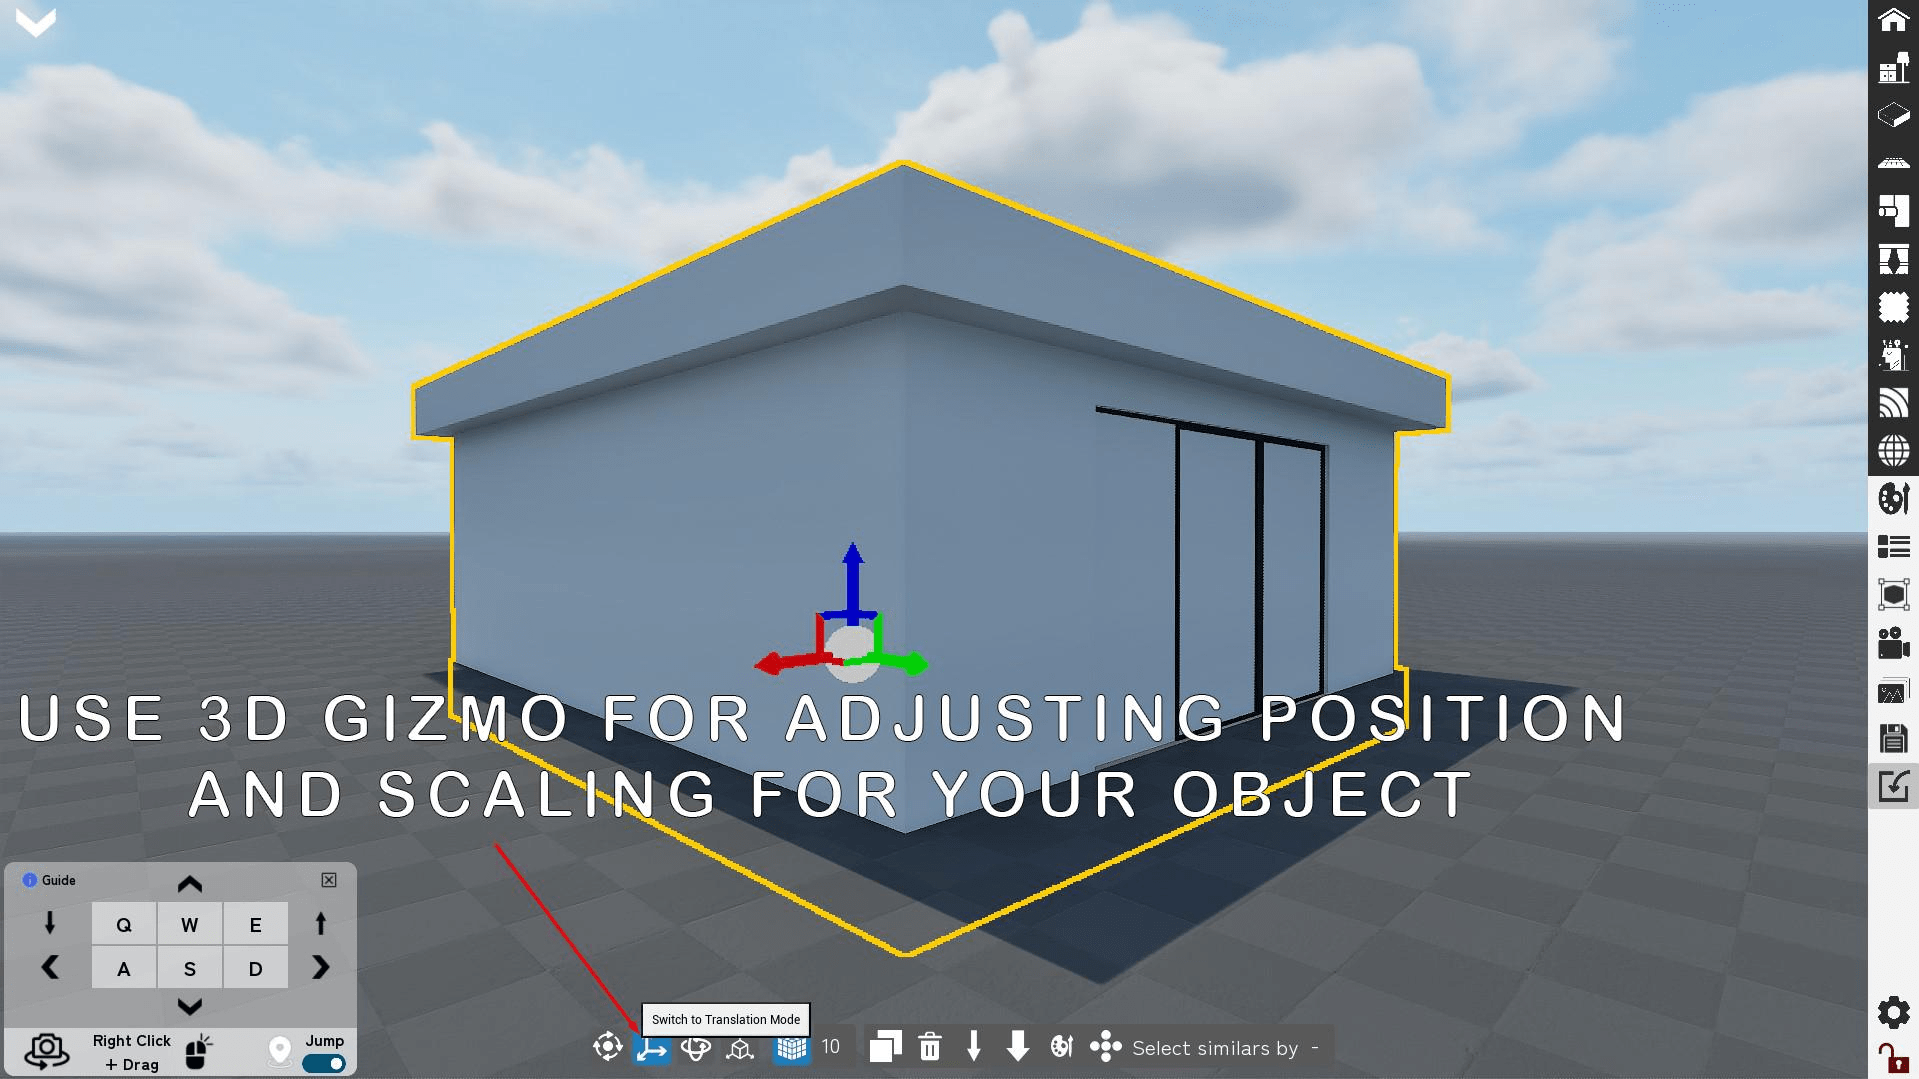
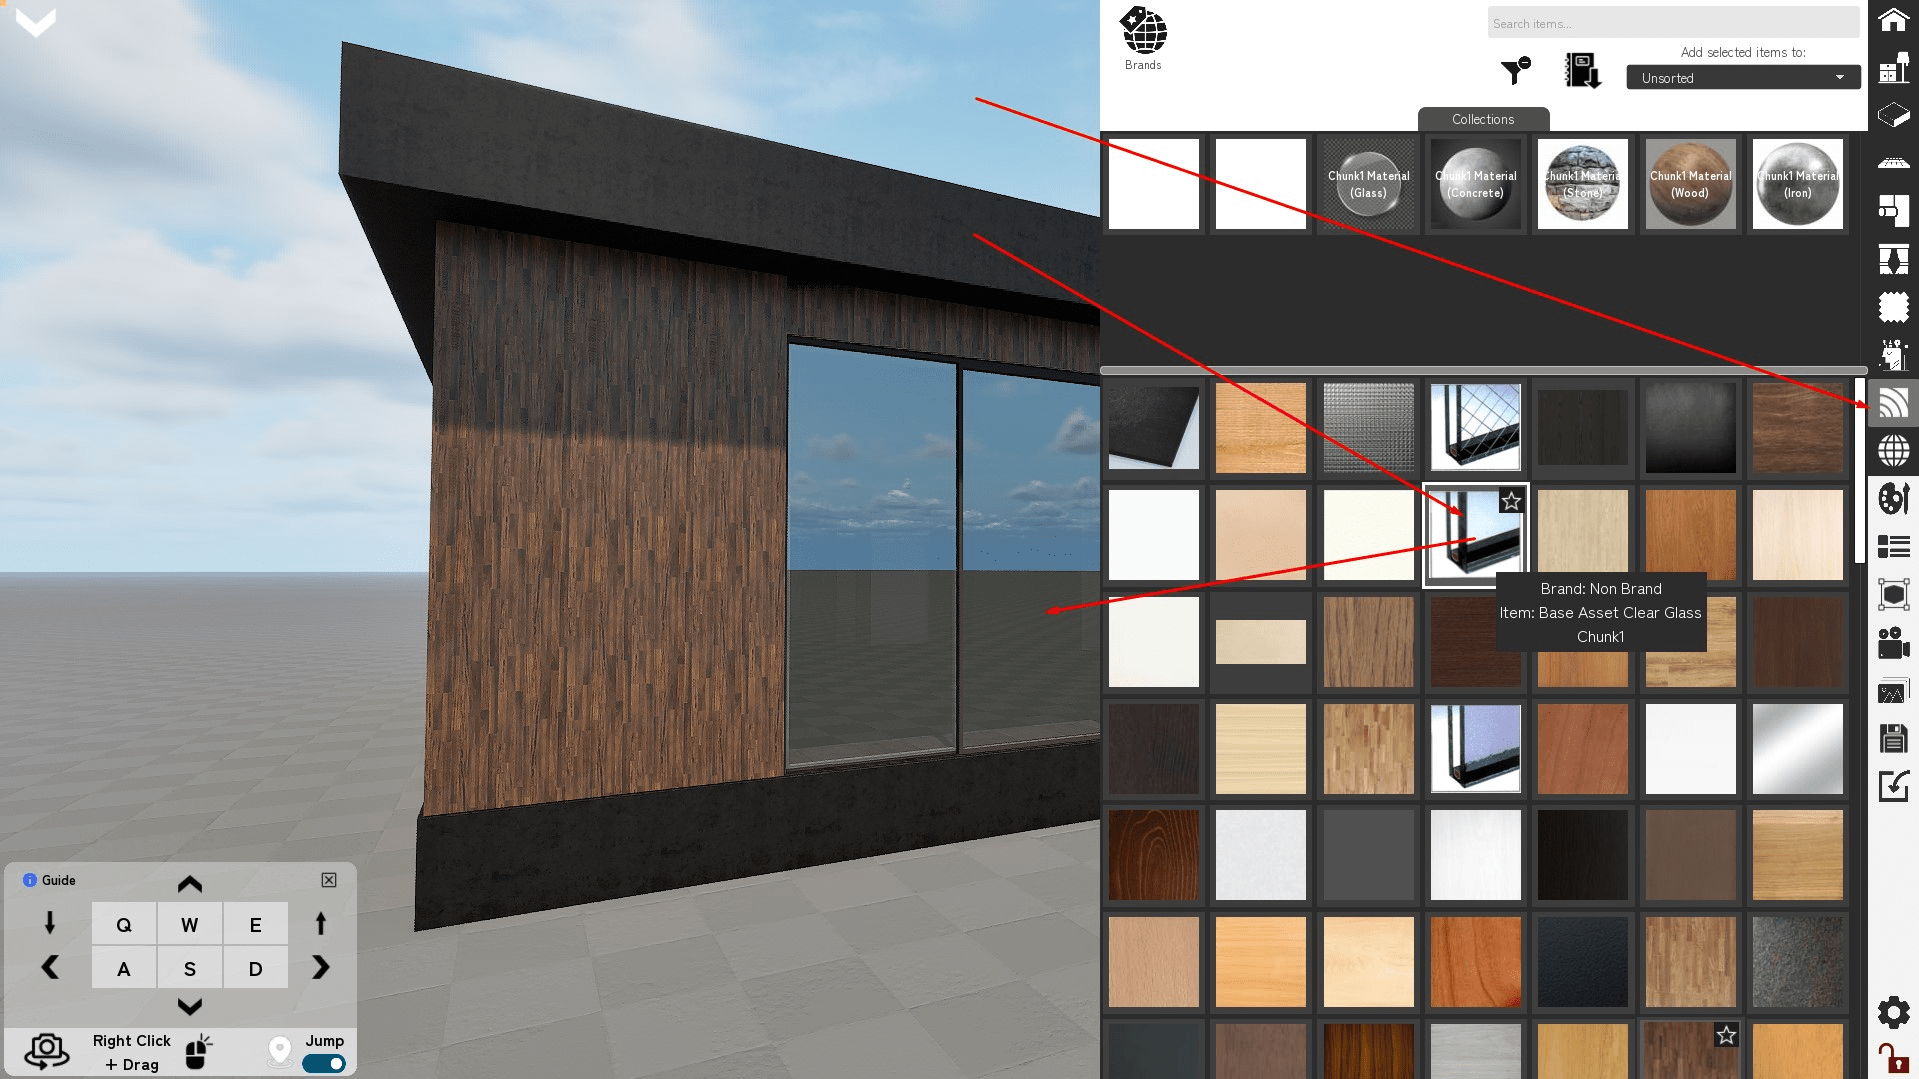
Step 11: For great and optimized workflow assign to all imported objects materials from R.Design catalog!